We lost two of our three honeybee colonies over the winter. While those two hives are unoccupied, we made a few improvements. Our hives are all horizontal Langstroth boxes built using the free plans available at Dr. Leo Sharashkin’s website – http://horizontalhive.com. The hives are the Long Langstroth Hive with Gable Roof and Screen Bottom. The hives are built mostly in accordance with Dr. Leo’s plans, but we did make a few modifications (and a few mistakes) building them, so they’re not quite exactly “to spec.”
In the year we’ve been keeping (or more accurately – losing) bees in these hives, we’ve noticed a few issues that we wanted to take the opportunity to correct while we await new bees to populate the two hives we lost over the winter.
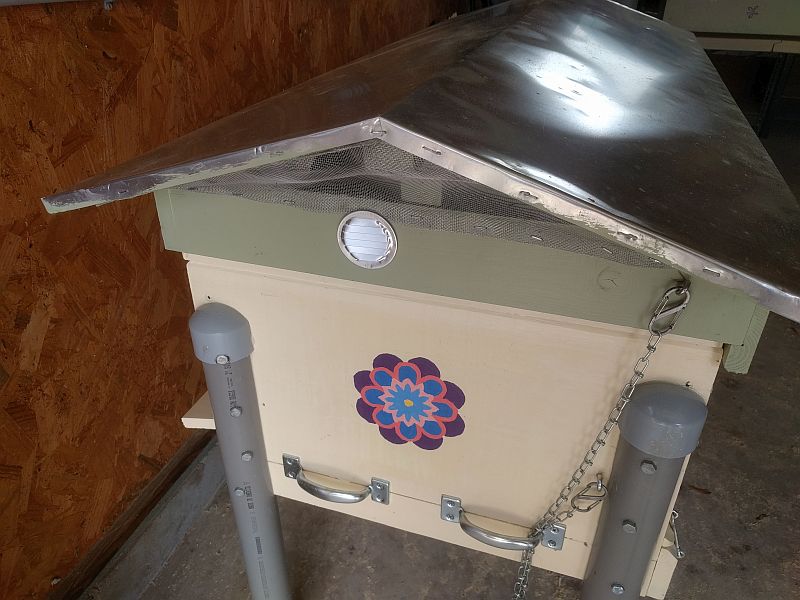
- The insulated tops kept the bees nice and cozy during the winter, but in the hot, humid South Carolina summer we were seeing a lot of bearding. That’s not a problem per se, but Dr. Leo recently posted a new plan for adding a ventilated hood that’s more suitable for the warmer summers, yet still allows insulation to be easily added for the winter without disturbing the bees.
- We were having a big problem with ants getting into the hive. This too isn’t a big deal, but we were combating the issue by painting Tanglefoot onto the hive legs. This kept the ants at bay, but also picked up the dust and vegetation pieces blown by the wind and kicked up by the weed eater. The bees were also getting caught in the Tanglefoot, and eventually, the Tanglefoot picked up so much debris that the ants just walked right past.
- The bees were propolizing the lid and the frame rests excessively making inspections more difficult than they should have been. We usually had to pound on the lid in order to break the propolis, which always made the “mood” of the inspections suboptimal. Also, we were smashing a lot of bees closing the lid after inspections. We tried putting cloth over the frames under the hood, but found that this prevented the bees from walking above the frames, and also created a place for small hive beetles and ants to congregate out of reach of the bees.
- We initially had the hives placed along a slope leading along a fence running from the house to the barn. We covered the area under the hives with weed-block cloth and pine bark mulch. This kept the weeds down under the hives, but also prevented us from seeing how many dead bees were being pushed out the hive entrances, and also gave an area for vermin like ants and small hive beetles to wander unmolested and undetected.
- We found that the wax moths who escaped falling into the oil pan traps under the screen bottom were infesting the open spaces inside the closed oil trap chambers. There was also a lot of debris in there, and it was very difficult to clean that out.
- During inspections, we always found a few dead bees in the empty part of the hive beyond the follower board from the nest. We tried to correct this by drilling a one-bee-space hole in the follower board, but it didn’t help. Somehow the bees were getting into that space, but never finding their way back to the colony and its stores so they were dying of thirst back there.
We tackled problem 4 first, digging out a trench with a level bottom wide enough to place the hives in and still leave room for us to get around them for our inspections. We put weed-block cloth on the bottom, then drainage rock, then concrete paving blocks. We did this over the winter while the bees were inside (or so we thought). Once we got in to inspect at the end of the winter, we found that two of the colonies had died out completely, and the third was very weak. Since two of the hives were then unoccupied until we could get some more bees, we took on the other issues.
The first part of the project was to pull off the old legs and throw them and the Tanglefoot away. We then took off the lids and the bottom boards under the oil traps. We replaced the boards under the ends and front of the main hive boxes with new ones into which a channel had been routed that would allow the bottom board to slide in and out like a drawer to allow the oil trap chambers to be cleaned without disturbing the bees. That took care of issue 5 in the list above.

Next to fix issue 1, we removed the insulation from inside the gabled hood, and added ventilation to the hood ends and bottom of the lid. We removed the staples holding the 1/8 inch underlayment board inside the hood, and replaced them with a few screws so that we can easily remove it from the hood to put the insulation back in.
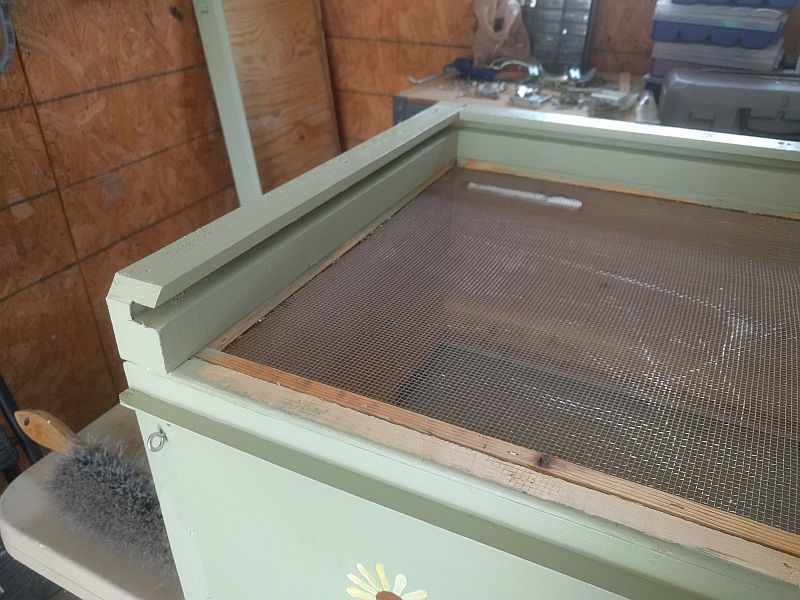
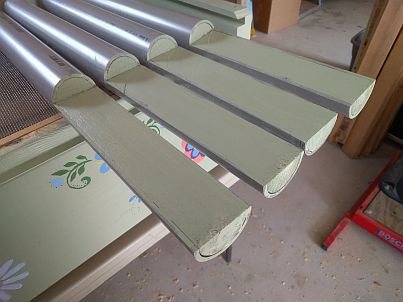
Next, we added thin top slats that allow the bees to walk over the tops of the frames, but fit closely together to prevent the bees from gaining access to the area above. This will allow us to minimize the disturbance of the bees during hive inspections and maintenance, reduce the problems with them propolizing the hood area, and keep us from smashing so many bees while closing the lid as noted under issue 3 above.
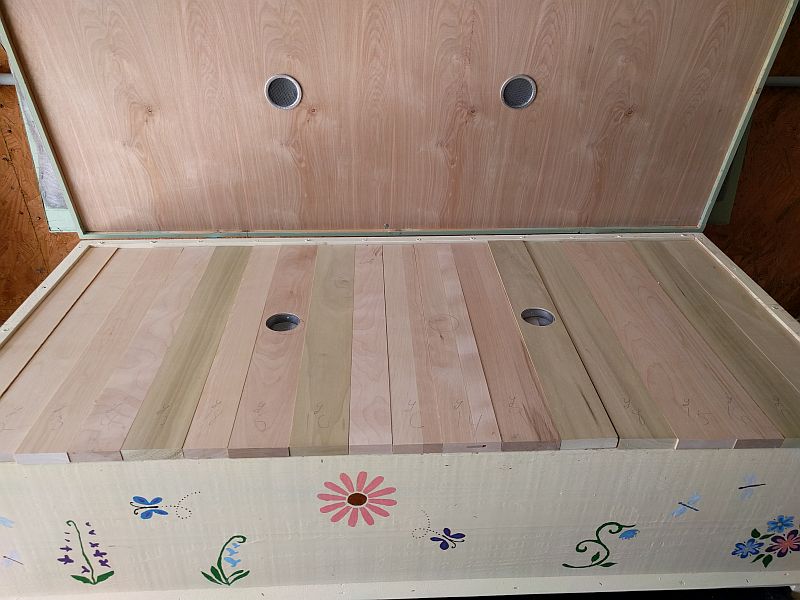
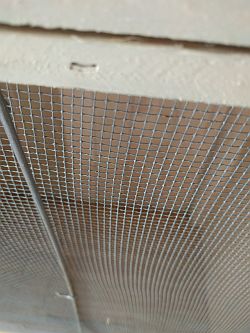
Two of these top slats have screened vents. These are placed directly under the screened vents in the hood so that air can flow up into the hood and out the ends. The screened vents prevent bees and other insects from gaining access to the inside of the hood.
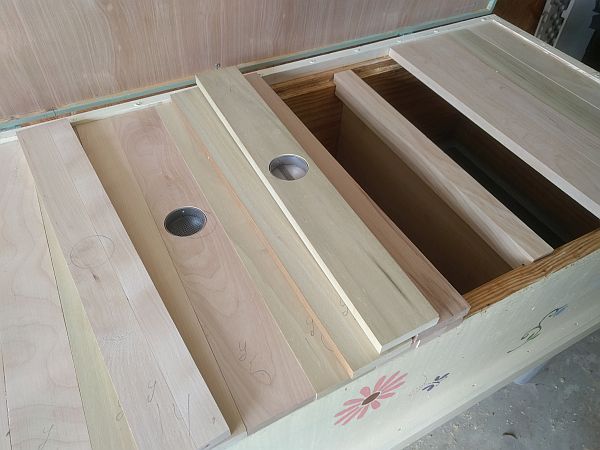
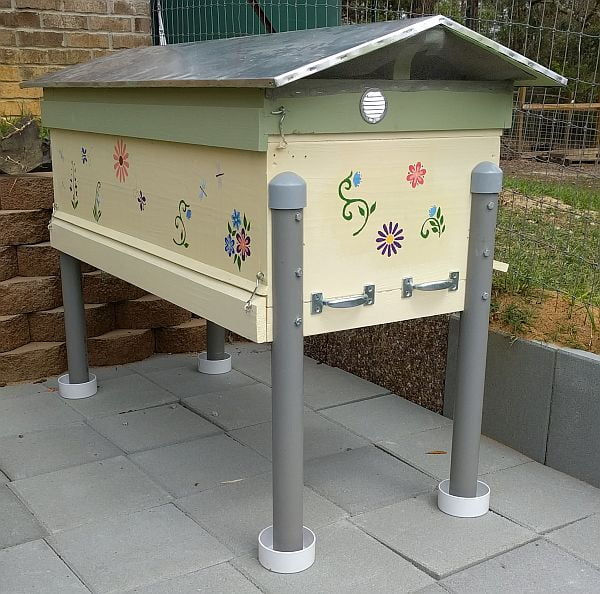
Notice that the slats rest on top of the main hive box, and the hood has been raised up 7/8 inch using pieces ripped out of a 1 x 4. The lift under the front (hinged edge) of the hood is 7/8 x 1/2 inch. The lift boards along the ends of the hive box are 7/8 x 3/4 inch. These three pieces are glued and screwed to the top of the hive box and hold the bottom of the hood 1/8 inch above the tops of the nest-top slats. They also hold the slats in place allowing them to be removed individually so that the minimum number of bees will be disturbed during inspections or when servicing division board feeders. The nest-top slats are 3/4 inch thick so that they can “float” in the 7/8 inch space between the nest and the hood. Lifting the hood to accommodate the nest-top slats necessitated adding a 1-inch overhang along the back (non-hinged) edge of the hood. The end of this overhang can be clearly seen at the right of Photo 3. This overhang prevents weather from getting into the box, and also holds the nest top slats in place when the hive is closed.
To address issue 6, we made some new follower boards that fit flush with the nest-top slats above them and the screen bottom below. This necessitated installing a spring bar (1/8 inch steel dowel) to hold the screen bottom up against the follower board since the screen bottoms sag slightly (enough to allow a bee under the follower board).
Finally, to correct issue 2, we built some new legs. These are made from 2-inch poplar dowel slipped inside 2-inch PVC conduit. The hive box rests in a notch cut into the dowel and the conduit. The dowel ends a few inches above the bottom end of the conduit allowing the PVC to be placed into a 4-inch PVC end cap that may be filled with water as a deterrent to the ants.
Good morning. Is this a kit or do you make to order. We are definitely interested. Thanks you.
No. I do not offer any kits. However, you can find free plans and pre-built hives for sale at https://horizontalhive.com. I do have one complete hive, and a number of components for these horizontal deep Langstroths, that are no longer in use and free for the taking. I live in the extreme Northwest corner of South Carolina. If that sounds interesting to you, use my website’s contact form and we can hook up.