Building Our Steel Arch Garage
- Part 1 – Ordering the Kit (First Missteps)
- Part 2 – Garage Foundation
- Part 3 – Foundation Issues
- Part 4 – Assembling the Arches – you are here
- Part 5 – Raising the Arches
- Part 6 – End Wall Woes
- Part 7 – Door Installation
Assembling the Arches
The structural support of corrugated steel arch buildings is all in the arches. Assembling the arches is straightforward. Ordinarily, the arches are assembled on the ground and then raised into place, but it is also possible to assemble them in place starting from the ground and working up. A neighbor in the next town has built a 100′ x 150′ steel arch building this way single-handed – no mean feat, considering the man is well over 70 years old!
We decided to go the traditional route, assembling the arches on the ground and raising them up. Even for our modestly-sized (20′ x 26′) building, the arches are fairly heavy, requiring several people and tackle to lift them up into place. We assembled each arch on the slab, and then staged them in the area behind the building.
There were some important lessons learned during the assembly process:
- It is extremely important not to tighten down the bolts until the building is fully assembled. The bolt holes are slightly bigger than the bolts that fit into them (IBC tie downs – 3/8″, remaining bolts 5/16″). This allows the panels to shift back and forth slightly. That becomes extremely important when bolting the arches together. We used a socket and extension to hand-tighten the bolts during assembly, but even then, we over-tightened some of them, leading to difficulties bolting the arches together when we raised them.
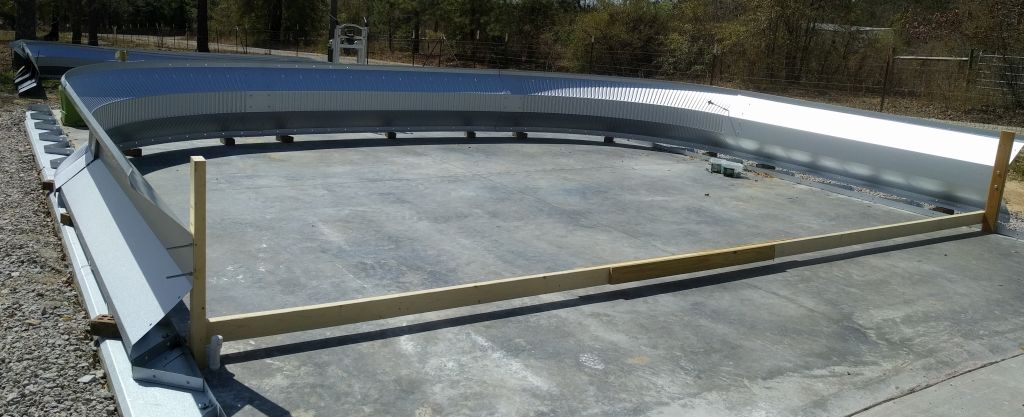
- The end arches have angles that need to be bolted to the outer edge. The angles accommodate the tops of the rear end wall. It proved very difficult to put these angles on the first arch we assembled (furthest away in this photo), because the angle needed to be placed under the arch. It was much easier to bolt the angles onto the arch at the other end (last arch assembled – first one to be raised) since this edge was on the top edge of the arch as it rested on the slab. We also made a mistake with the first arch, overlapping the angles by two bolts. They only overlap at the single end bolt holes. We had to pull the angles off and re-install them. This was made more difficult because the end wall angles are caulked with butyl rubber caulk – very sticky stuff.
- The arches are extremely flexible and easy to bend until they are bolted together. This made it hard to move them back into the staging area without damaging them. The wooden structure in the foreground of the photo was used to stabilize the free ends of the arches while we were moving them.
- Care must be taken to overlap the arch panels and the end wall angles properly, so that water will run off the outside rather than into the seams.
Next post – Building Our Steel Arch Garage Part 5 – Raising the Arches
Previous post – Building Our Steel Arch Garage Part 3 – Foundation Issues