Building Our Steel Arch Garage
- Part 1 – Ordering the Kit (First Missteps)
- Part 2 – Garage Foundation
- Part 3 – Foundation Issues
- Part 4 – Assembling the Arches
- Part 5 – Raising the Arches
- Part 6 – End Wall Woes – you are here
- Part 7 – Door Installation
End Wall Woes
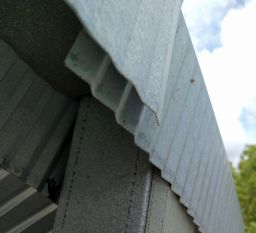
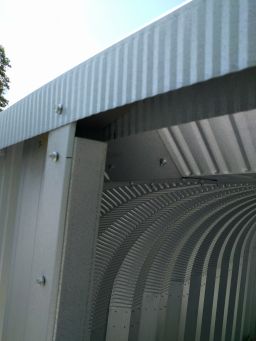
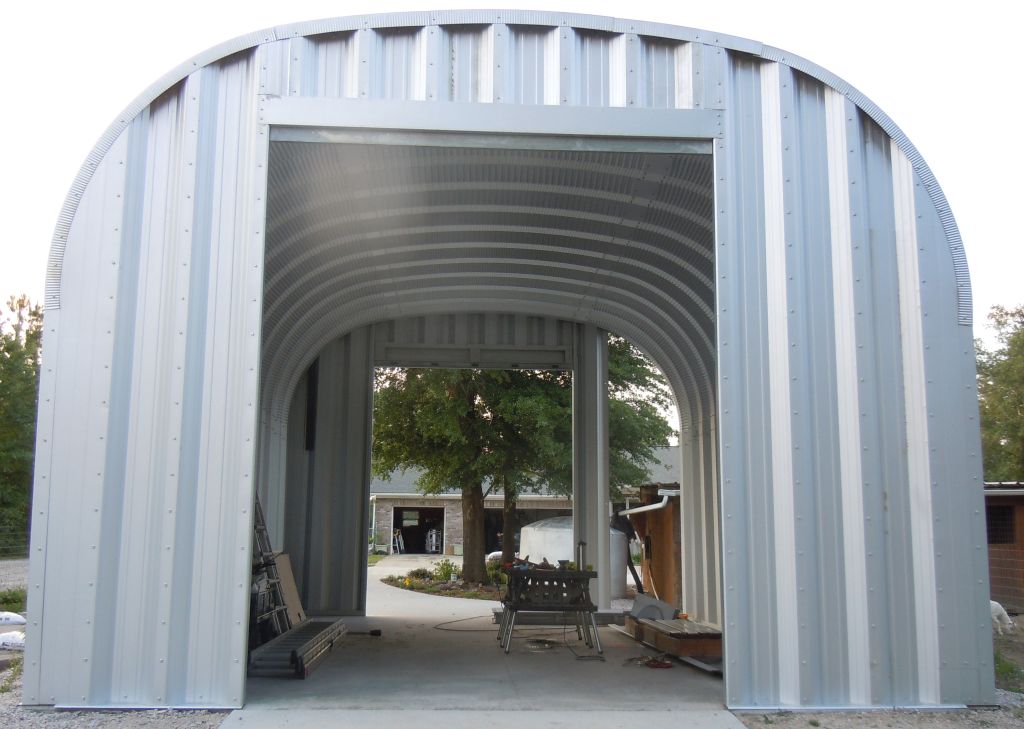
With the arches up, I thought the hardest part of this project was behind us. As it turned out, even though the really hard labor was done, the most time consuming part of the work was still to be done. First off, recall that when I initially ordered the building, I ordered it with a standard foundation that requires 3.5 inch deep sills to be cast into the slab, which are later to be filled in with grout after the building is complete. Remember also that I had decided a little later to order Industrial Base Connectors, and that the IBC foundation doesn’t have the cast-in sills. Effectively, this meant that the building was raised up by 3.5 inches when it was installed. This created a gap in the end walls above the roll-up doors. When I realized this, I ordered some longer over-door end wall panels, but they never arrived.
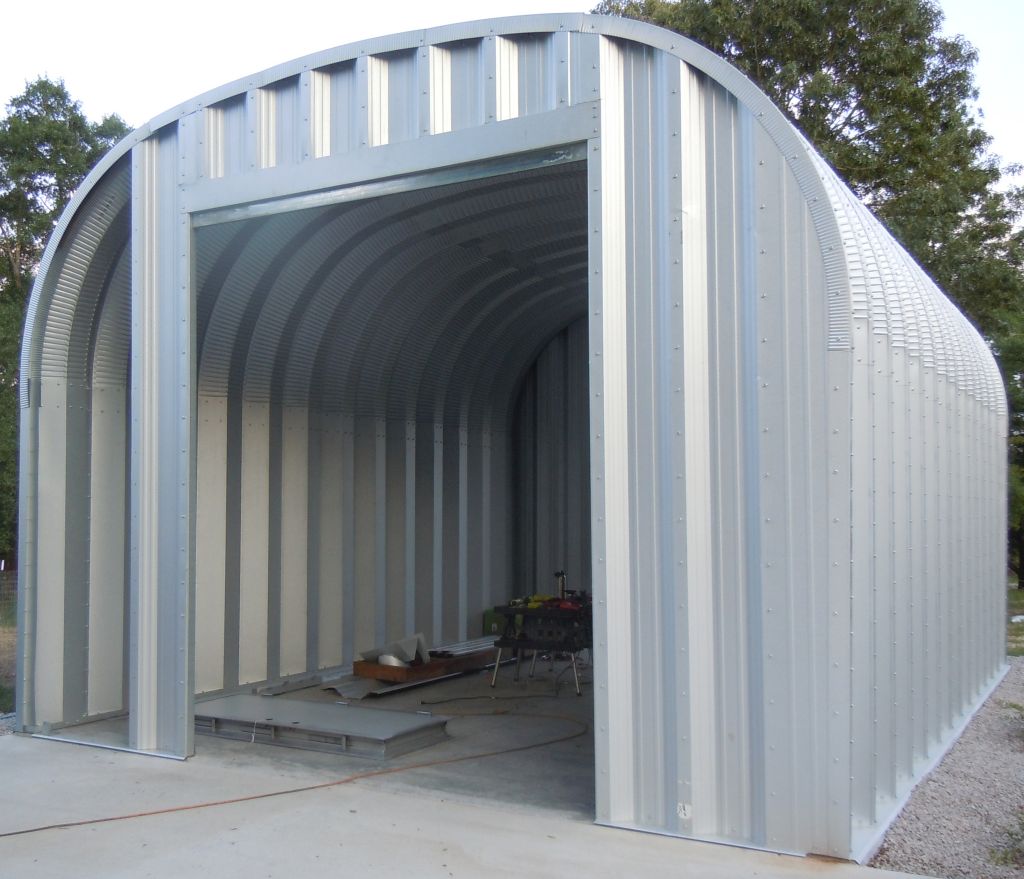
In the meantime, I discovered some other issues. First off, what may not have been obvious from previous photos is that the roll-up door openings are not centered in the building but are offset to one side in order to accommodate the walk-through door on the front end of the building. Unfortunately, Steelmaster didn’t account for this offset when manufacturing the door posts for the sides of the roll-up doors.
Notice that the door posts on the walk-through door side of the building aren’t long enough to extend up into the end-wall angles bolted to the end arches as they should. This left no way to attach these posts to the arches on that side of the roll-up door.
I contacted Steelmaster engineering support, and they told me that the roll-up door posts (called door stiffeners in the literature) are not supporting members (recall that all of the load-bearing is done by the arches themselves). They advised me to use a doubled section of the thin-gauge 2″ angle they had provided as a construction aid to tie the short door stiffeners into the arch angles.
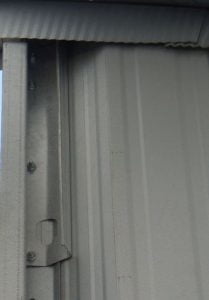
I really didn’t like this idea much, given the weight of those 10′ x 12′ roll-up doors and the day-to-day stresses of opening and closing them, so I bought some steel stud the same thickness (18 gauge) as the door stiffener, and bolted it into the short door stiffeners, the arch angles, and the end-wall corrugated panel as shown in this photo. This made the roll-up door frame sufficiently stable, and held it plumb and stiff (unable to corkscrew). After correcting that issue, I went ahead and ordered my roll-up doors from Aiken Overhead Door in North Augusta, SC. At this point I made the biggest mistake of the entire build. You may have noticed from the photos in the previous posts that the end-wall IBCs had not yet been installed. It would have been very difficult to haul the scaffolding and arches over them as we were raising the arches, so I delayed installing them until after the arches had been raised. When the time had finally came to install the end wall IBCs, I noticed that the opening for the roll-up doors was about 2.5″ too narrow. I was in the process of discovering this the day the door company sent out their representative to survey the site. I pointed out the discrepancy in the door frame opening width to him, and he told me that it would be no issue, because even though the door specification called for exactly a 10′ wide rough opening, the doors would actually mount inside the building behind the opening, so the additional overlap of the building’s door frame with the doors’ roll-up channels wouldn’t be a problem, and would in fact be beneficial in terms of the strength of the door against the wind.
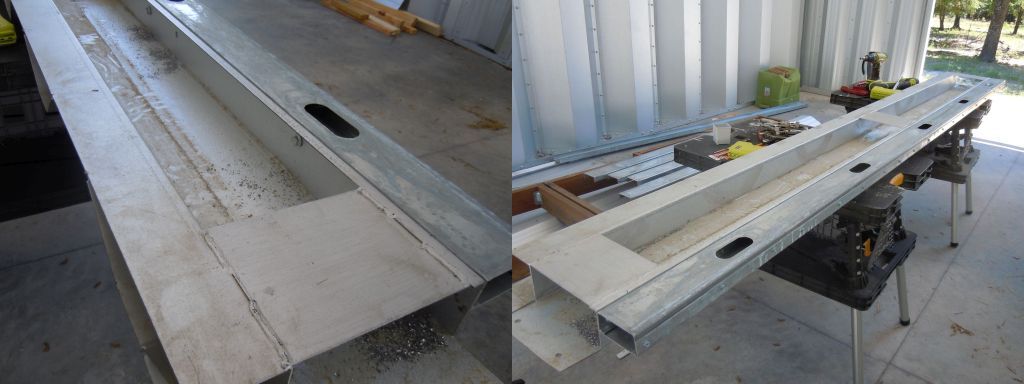
I liked that idea, so I decided to stick with the narrower opening rather than cutting off the excess 2.5″ from the short-side IBCs. Man was that ever a major blunder. What I had forgotten was that the lintels above the doors were built for exactly a 10′ wide roll-up door opening. By the time I realized my mistake, I had already installed the end-wall IBCs, the roll-up door stiffeners, and the end-wall panels on the sides of the doors. When I realized that this meant the lintels were too long, I had to choose whether to take all that stuff down and go back to the standard width door opening, or shorten the lintels. I decided on the latter, and that was a big mistake as well. Nevertheless, I started in on the work of shortening the lintels.
After two good solid days of work, I put the shortened lintels up in their place, and reached a stopping point. I couldn’t do any further work because before the roll-up doors could be installed, I needed to install the over-door panels. Once the doors were installed, I would no longer be able to reach the area above the door to put in the over-door panel bolts. By this time, it had been nearly two months since I had ordered the longer over-door panels necessitated because the use of IBCs on a flat foundation instead of the standard notched foundation had raised up the whole building by 3.5 inches. I realized I would have two 80-inch pieces of extra end-wall panel available from cutting out the walk-through door opening in the front wall. I thought that if I didn’t use the four outside over-door panels, moving the middle ones out toward the sides, I would have just enough end wall panel material from the walk-through door cut-out to make the four middle over-door panels I would need to finish the end walls and get my roll-up doors installed.
I called up Steelmaster engineering support to verify this could be done, and they confirmed I could do it. So I cancelled my order for the longer over-door panels. Since they had not yet been manufactured after nearly two months of waiting, I assumed I would receive a refund for the over $700 I had paid. Unfortunately, this was not the case. Instead they offered me some accessories at no cost. I opted for two turbine type roof vents, which I will install at a later date. It wasn’t nearly what I had paid for the over-door panels, but it was all I could get.
I cut the needed longer middle over-door panels from the walk-through door cut out materials, and set about putting up the rest of the end wall. But the original middle panels I had moved toward the outside were about an inch too short, despite what the engineering support folks had told me. I needed a new plan, and I was completely unwilling to plow another $700 into longer over-door panels which wouldn’t arrive for a further six weeks to two months at the very best. I decided to use the original over-door panels, and raise the lintel up by 3.5 inches.
To fill in the resulting gap above the door, I attached an 18 gauge steel stud and track under each lintel.
Then I hung up the two lintels to allow a 12′ high roll-up door opening under the filler stud/track.
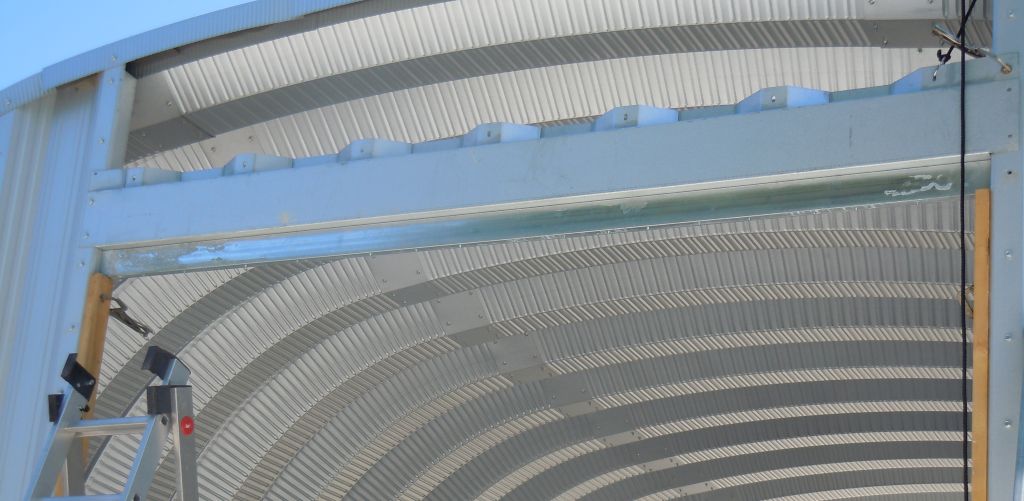
Finally, I installed the original over-door panels.
Once all that was done, I was finally ready for the roll-up door installation. Or so I thought.
Next post – Building our Steel Arch Garage Part 7 – Roll-up Door Installation
Previous post – Building our Steel Arch Garage Part 5 – Raising the Arches