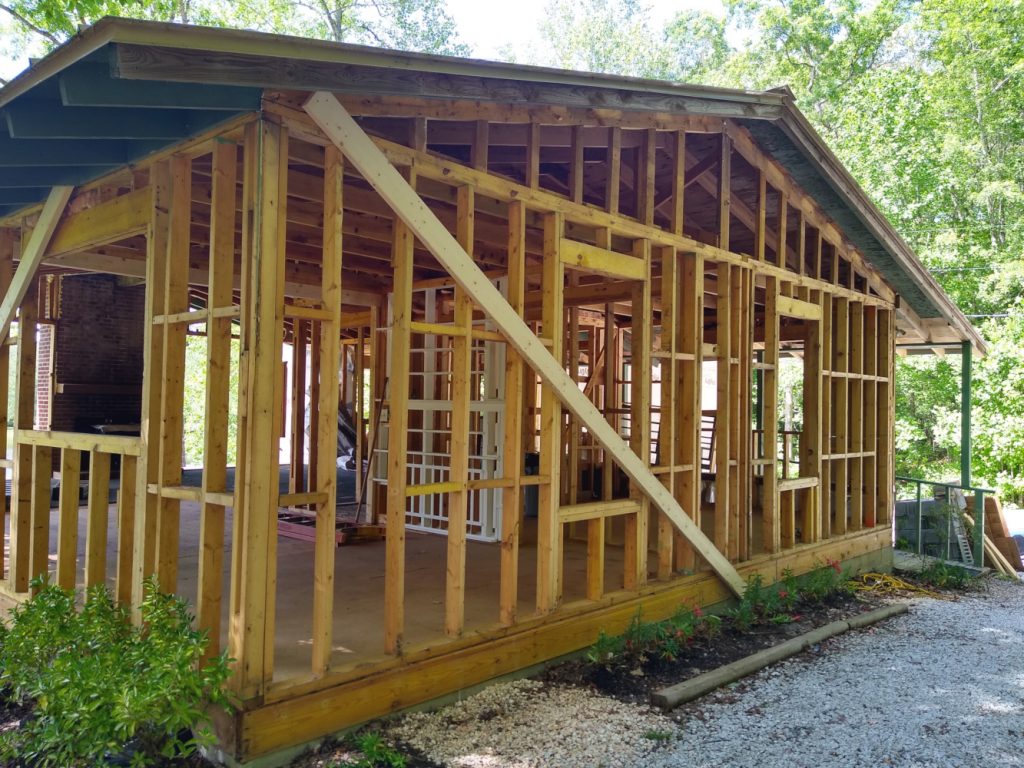
Upon seeing the plans for the renovation during our first meeting with the builder, our friend Tana Evans of Century 21 in Seneca, SC remarked that it might just be cheaper to tear the old house down altogether and build a new one. How right she was. Our intent from the outset was to remain in the house as long as we could before vacating to allow completion of the project. Once the framing and sheathing of the new addition was completed during the second week of May, it was time for us to get out of the way.
May 13-25, 2021
Before the demolition could begin in earnest, we needed to remove all the stuff we wanted to preserve. We found temporary lodging in Walhalla, and moved into it on May 13th. We were then able to move the remainder of our furniture, clothing, foodstuffs, and other household items into the temporary quarters and into our two local storage lockers. Then we spent the next couple of weeks while the addition framing was being completed getting ready for the demolition. We started by taking out all the tongue and groove wall paneling that we intend to reuse as wainscotting throughout the house after the drywall goes up. Then after disconnecting and moving the dishwasher and gas range out of the way we removed the remaining granite countertops. I had intended to try to sell these, but unfortunately I broke the main L-shaped piece trying to lift it out. The plan is now to reuse the island countertop and one half of the broken one as the new hearth for the wood stove. More about that later. Once the countertops had been removed, we were able to uninstall the remaining kitchen cabinets. Our initial intent was to try to sell all of these, but Sue wanted to use the island cabinets with all their drawers as a cutting table and storage cabinet in the sewing studio.
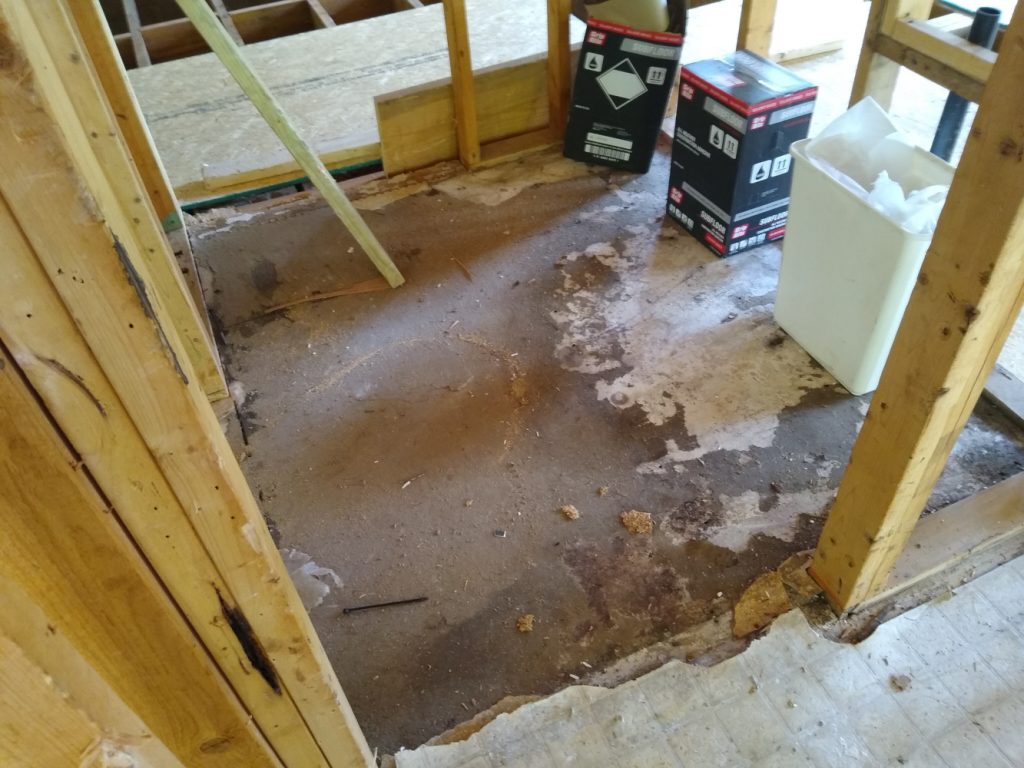
With the cabinets out of the way it was a fairly easy process to lift up the laminate flooring throughout the house in the opposite order from when it was installed. Almost all of the flooring came up without damage, and we were able to sell it easily. After the laminate flooring had been removed, some of the deeper underlying issues with the structure of the house became evident. The floor under the laminate was an eclectic (the nice word) mix of various materials. In the living room was some truly hideous navy blue indoor/outdoor carpet whose backing had separated and was stuck to the underlying particle board sub-floor. With the relatively recent laminate flooring removed, the stink emanating from this carpet was enough to drive a fly off a heap of dung.
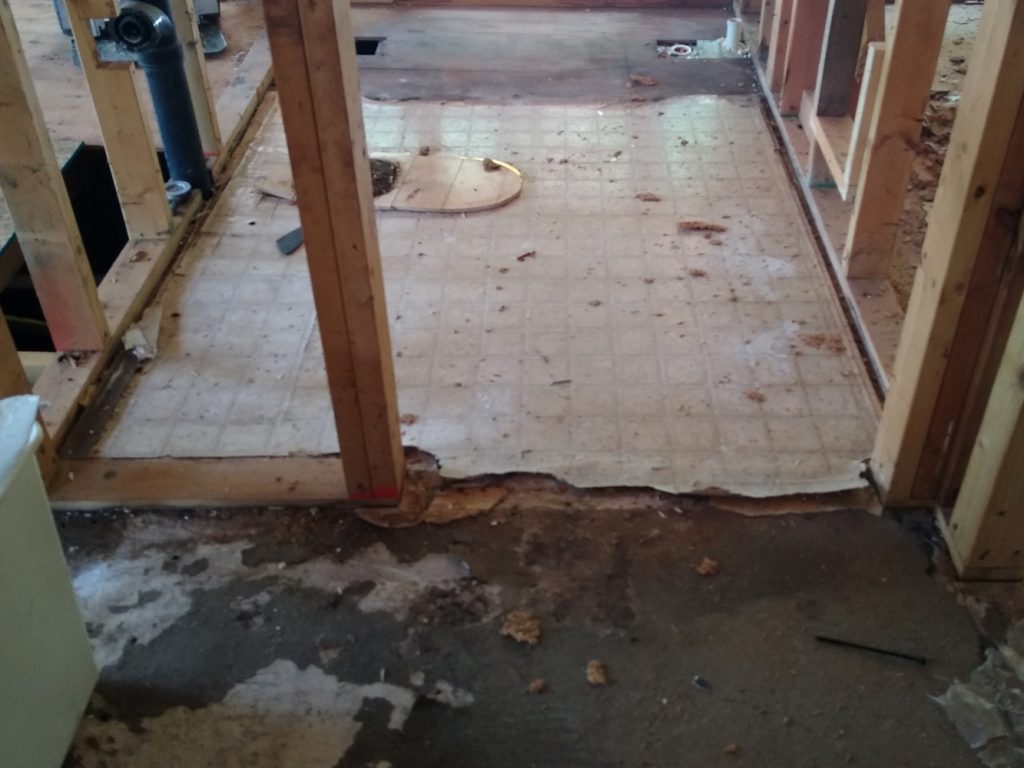
In the bathroom, the former laundry room, and parts of the kitchen the remnants of some vinyl sheet flooring with a faux tile texture pattern were still present in places. In the two bedrooms, Sue had previously removed some truly monstrous burnt orange shag carpeting reminiscent of my worst acid trips back in the day when it was young. Except in the bedrooms, the laminate flooring had simply been laid down over the top of whatever flooring had previously been used in each room without much heed to leveling it out, then the kitchen cabinets had been put down on top of the laminate with the incredibly heavy granite countertops on top of them. The net result of this was that the laminate floor was uneven to the point that we often tripped while walking across it.
After all of the fixtures and contents of the house worth saving had been safely stored away, we were ready to finally turn the house over to the demolition crew. But every step of the demolition seemed to reveal yet another problem with the underlying structure, until we came to the realization that Tana had been right when she said it would have been cheaper and quicker to simply tear the entire original house down. But by that time we were too far down the road to start over.
May 29, 2021
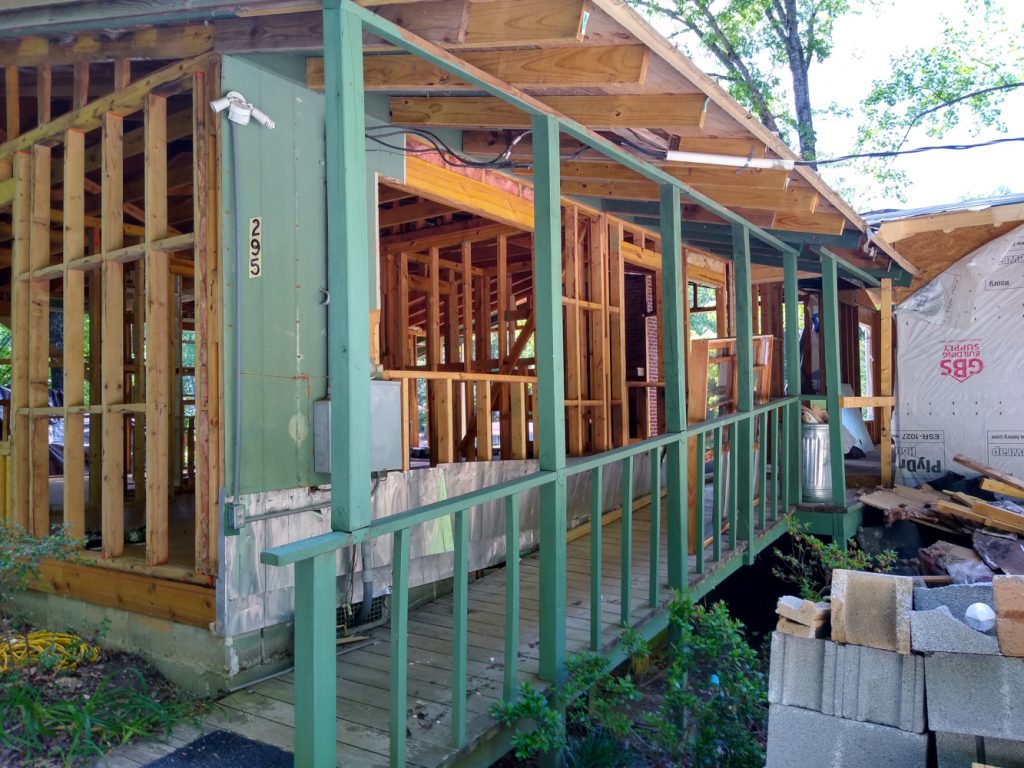
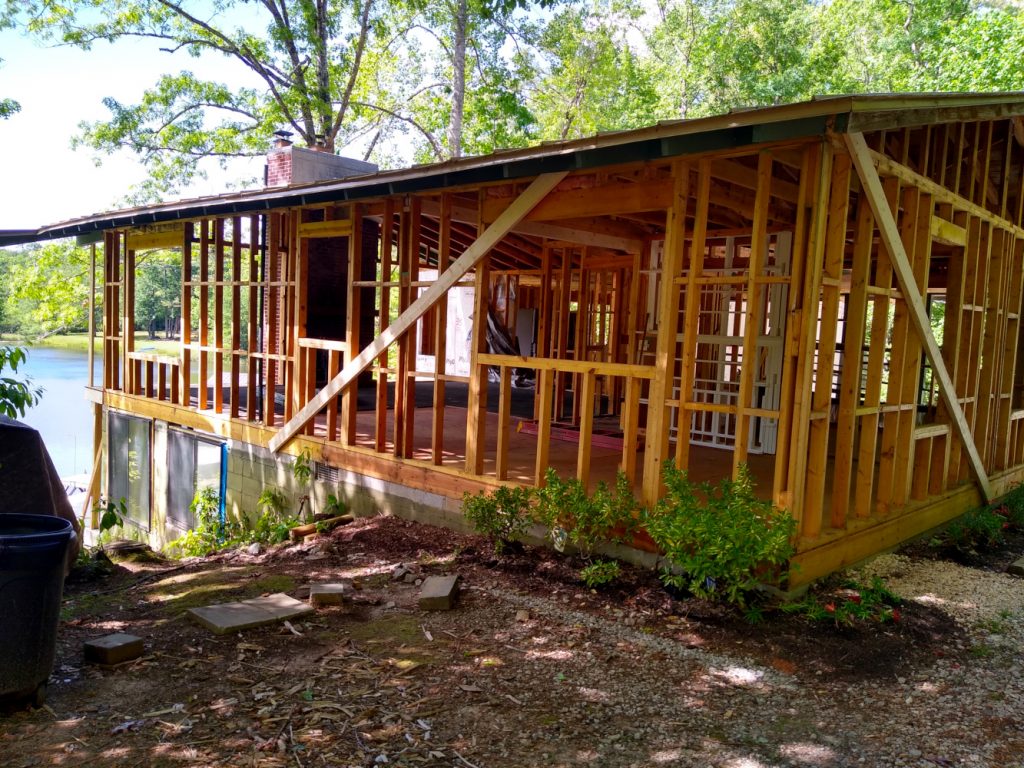
Even before we finished moving everything out of the house, the demolition crew began tearing off the Masonite siding from the house. Much of this siding, particularly along the back and west side of the house was rotting due to exposure to rain and watering of the plants that had been planted in beds along those walls in direct contact with the siding. Removing the siding took only a few hours.
The crew then set about tearing out all the paneling and drywall from the walls and ceilings. By the end of the day, only the bare frame of the house remained. Only the portion of the siding to which the electric meter was mounted, the paneling to which the circuit breaker box inside the bedroom closet was mounted, and the pantry shelves I had built into the wall between the pantry and bedroom before this whole project began remained.
June 3-4, 2021
The house stood this way for about a week while we awaited delivery of the lumber needed for framing of the new front deck and its roof. Once the lumber was delivered, the crew returned to finish restoring and leveling the floor.
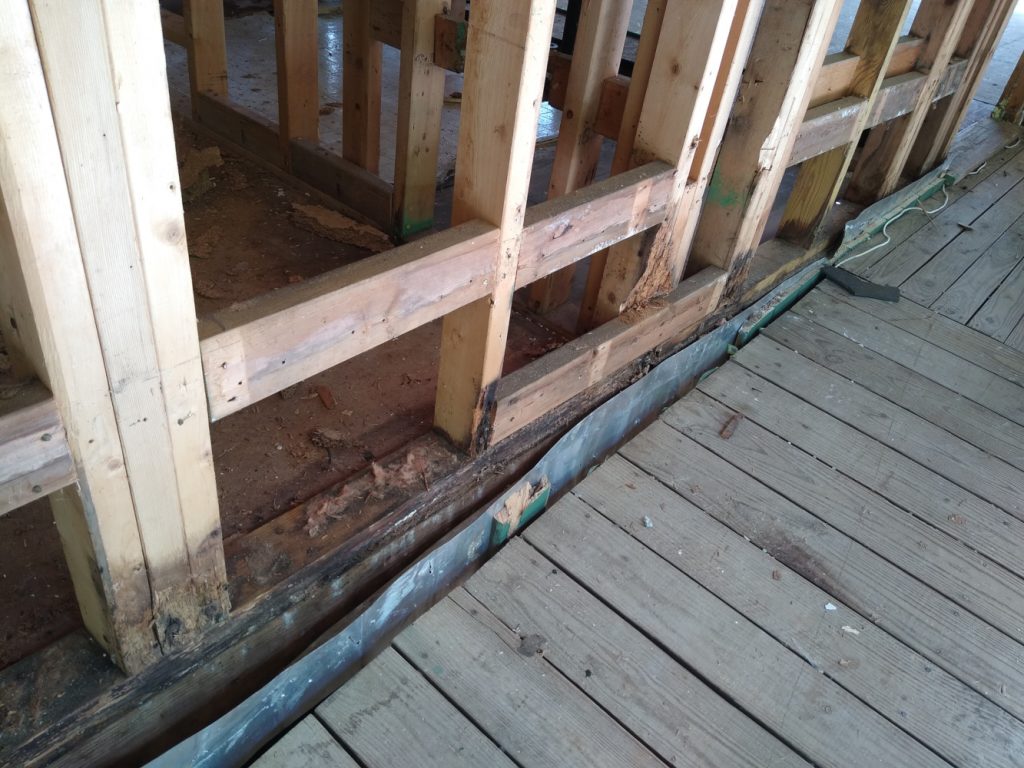
As it turned out, the waviness of the floor was caused by a combination of leftover former floor coverings scattered under the laminate, and rotting of the particle board sub-floor caused by water leaks in the bathroom and kitchen as well as longstanding exposure of the floor to humidity during the long periods in which the house was left unoccupied without air conditioning or heat.
But with the laminate removed, it became apparent that the old sub-floor would also need to be removed. We had thought that the unevenness of the floor had been caused by settling of the floor joists. Recall that during the laying of the foundation, concrete piers had been poured in the crawl space to facilitate the anticipated re-leveling of the floor joists.
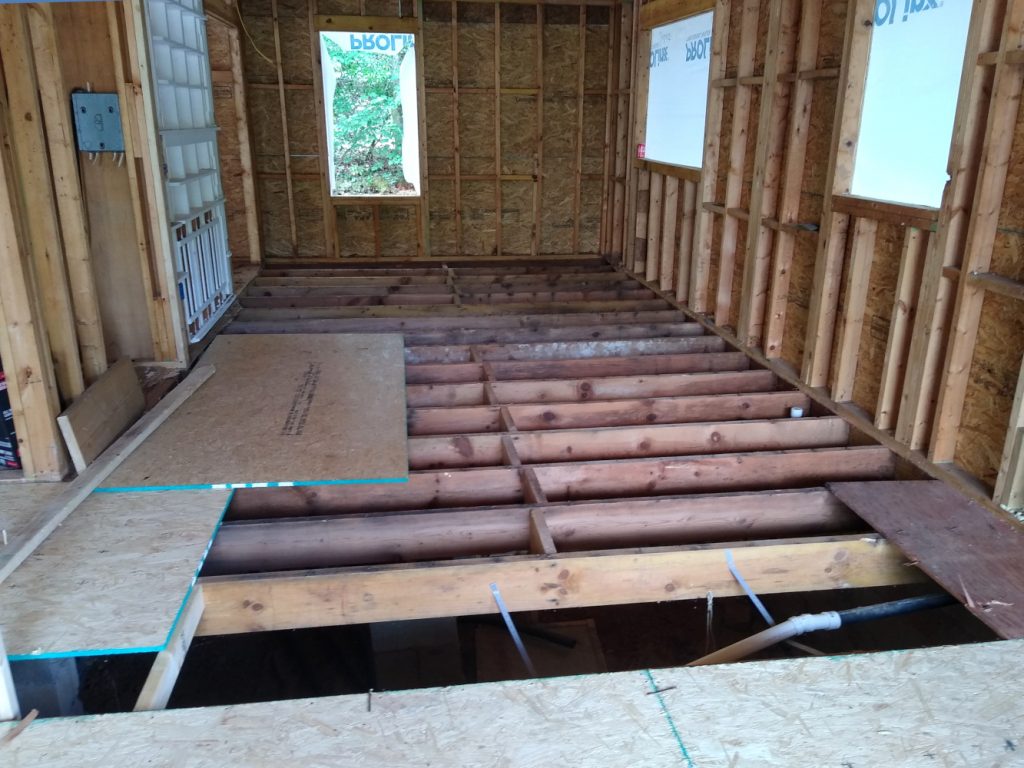
Once the old floor coverings were removed, the condition of the sub-floor was show to be so poor that it all had to be pulled up. Even the sub-floor had a storied history. Apparently, when the house was built, the sub-floor was a single layer of 1/2″ plywood. Someone along the line decided that this was too flexible and laid down 3/4″ particle board on top of that. In many places, the particle board was so compromised that it needed replacing. But when it was pulled up, we found that the underlying 1/2″ plywood was also rotten in many places.

Compounding the issue was that when the addition was laid out, we didn’t realize that the sub-floor of the original house was in two layers. The framers had taken great care to ensure the tops of the floor joists in the addition were level with the tops of the floor joists in the original house. But once the siding and paneling was removed from the walls it became apparent that the tops of the sub-floor sheets in the original house were 1/2″ higher than those in the addition.
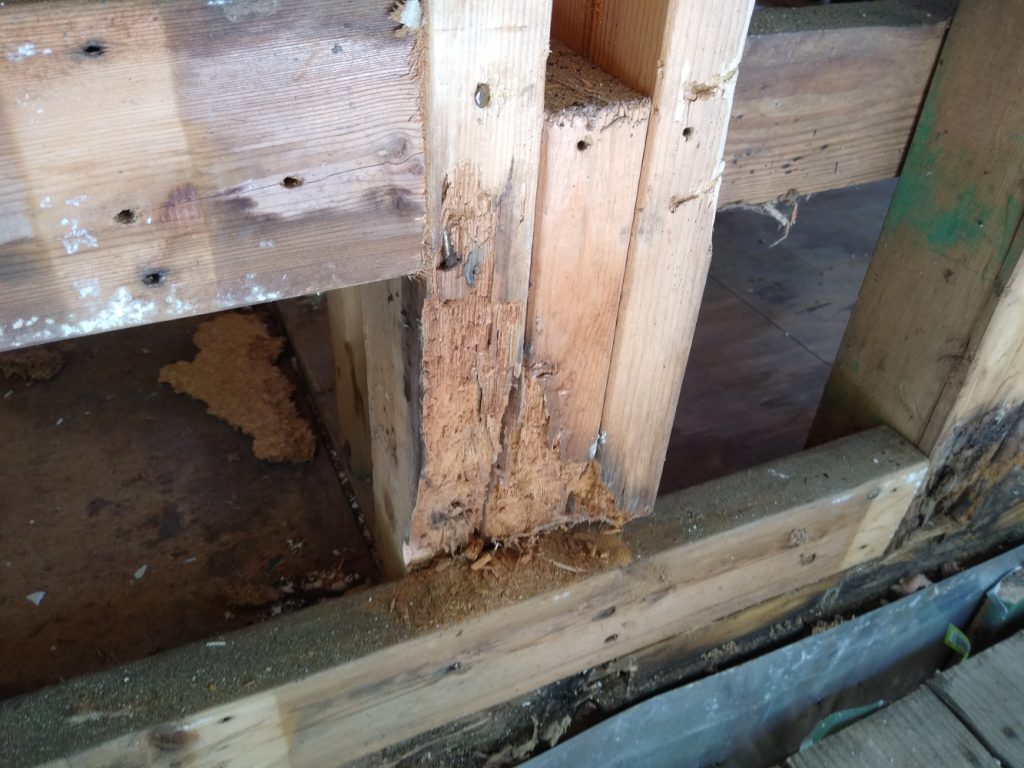
So the fact that so much of the original house’s sub-floors were rotten made it an easy decision to simply remove all of the original sub-floor sheets, and replace them with new 3/4″ OSB sheets – thus solving the difference in floor level between the addition and the existing house. In addition to the rotting of the sub-floor sheet, the removal of the siding revealed that an apparent long standing leak in the bathtub area had been left unattended long enough to allow the outside wall sill and lower few inches of the studs near the leak to rot and become infested with termites. Although there was no sign of any active infestation (as noted in the original home inspection when we bought the house), the damage to the framing in this area was severe and required that these frame members be replaced.
Once the sub-floors were removed, it turned out that much of the waviness of the original house floor was removed with them. So very little jacking of the original floor joists was needed to level out the floor. But the leveling of the floors revealed another issue. Solving that required a major change of plan.
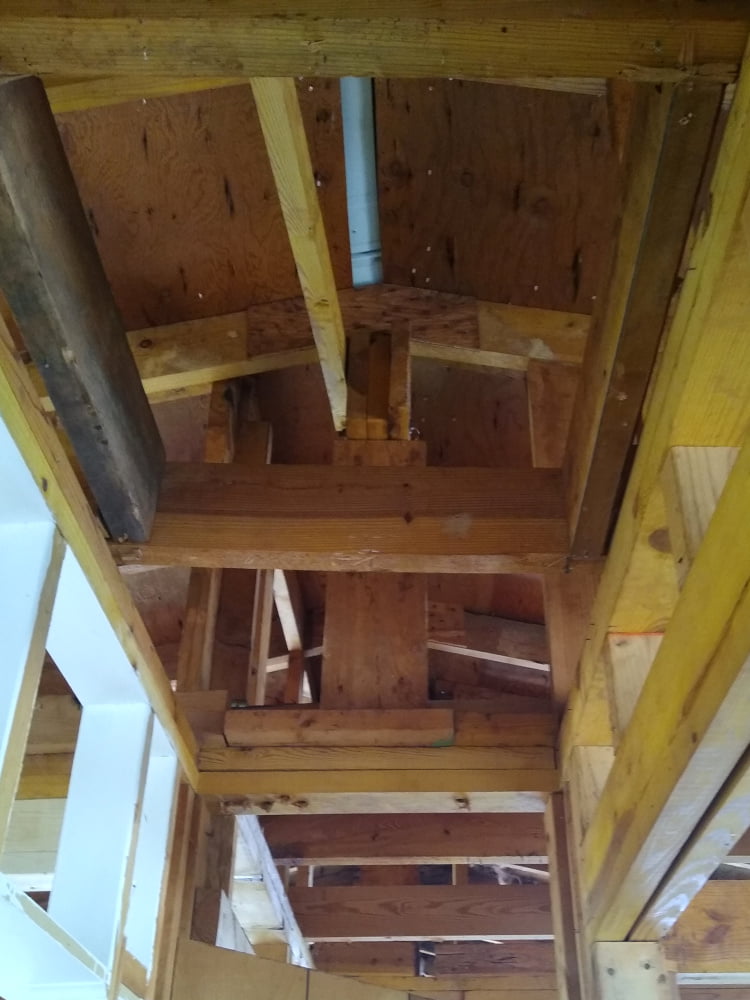
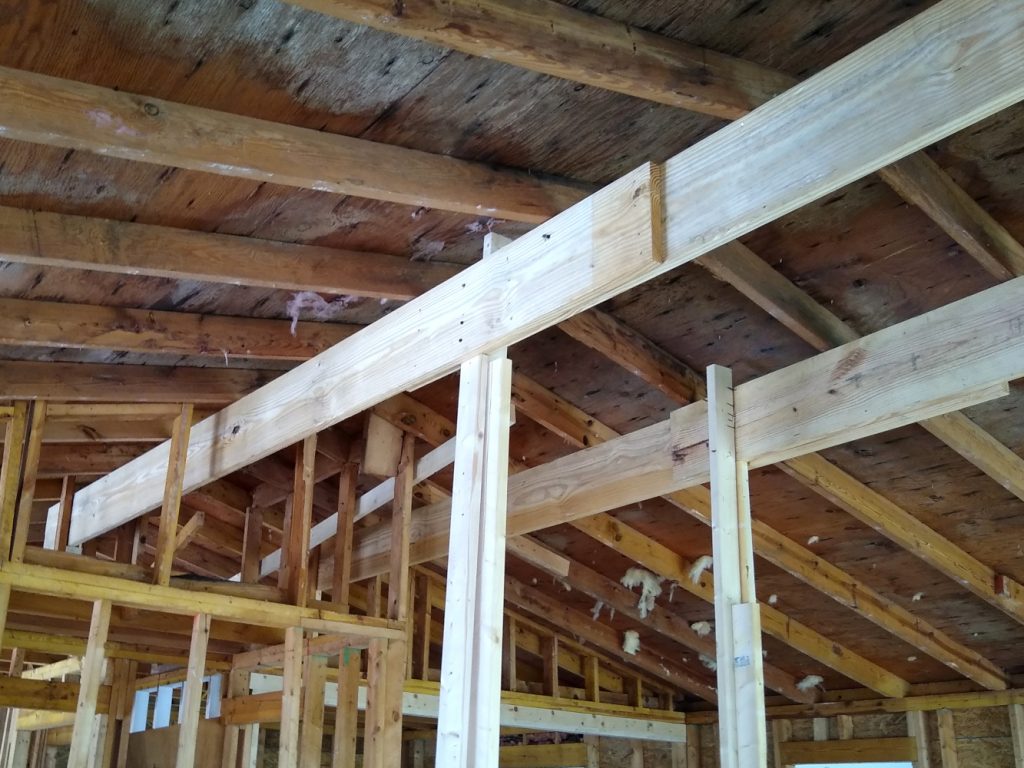
Once the sub-floors had been removed, and the underlying joists leveled, it became apparent that the roof ridge beam and some of its supporting structure would need to be repaired. The house had always had a little wave in the roof line. We had assumed that this was due to settling, and intended to resolve it when we re-leveled the floor. But as noted above, the floor joists were all reasonably level, so the wave in the roof was being caused by damage to the roof framing itself.
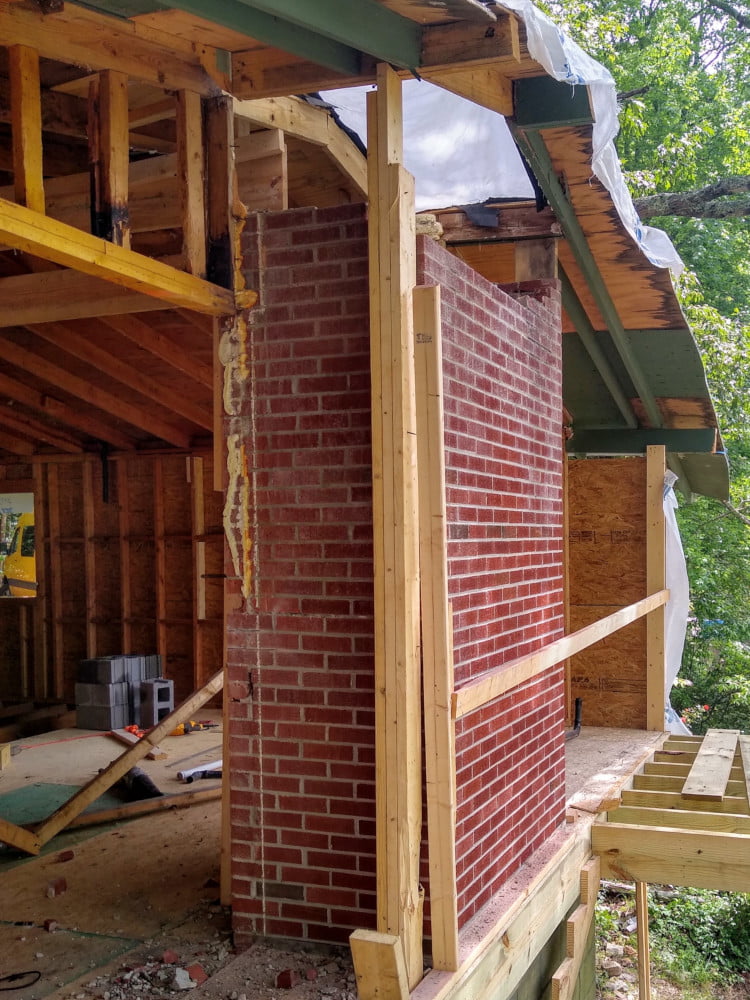
As mentioned in previous posts, the chimney masonry had always seeped a little, particularly after heavy rains. This was due to compromised flashing around the chimney at the roof line, and cracks in the chimney’s cement cap. We had intended to resolve all of this during the project. The original project roof plan called for the ridge line of the addition to extend all the way across the front of the house aligned with the rear face of the chimney.
We had previously had some of the rotten roof framing replaced, and repairs made to the roof ridge beam where it had rotted away and been infested with carpenter ants a few feet back from where it notched into the masonry of the chimney. The intent had been to complete these repairs to the roof framing and sheathing as part of this project.
Then our builder threw us a curve ball. While the floor demolition was being done, he came up and asked us, “How in love are you with that chimney?” I had always liked the chimney which is very solidly constructed – the water seepage through the masonry notwithstanding. So my response to the builder was, “Why do you ask?” He was (rightly) concerned that the repairs to the roof framing might be construed as being extensive enough that an inspector might consider them “new work.” As such, the work would have to meet current building codes which specifically disallow using a chimney to support the roof ridge beam. Furthermore, the existing ridge beam that was previously repaired would no longer be legal due to inadequate depth for its span. The manner of its construction using nuts and bolts to hold the three beam constituent planks together would also no longer be legal. It was conceivable that an inspector might reject the entire project, requiring a large proportion to be torn down and re-done – nearly doubling the final cost of the project!
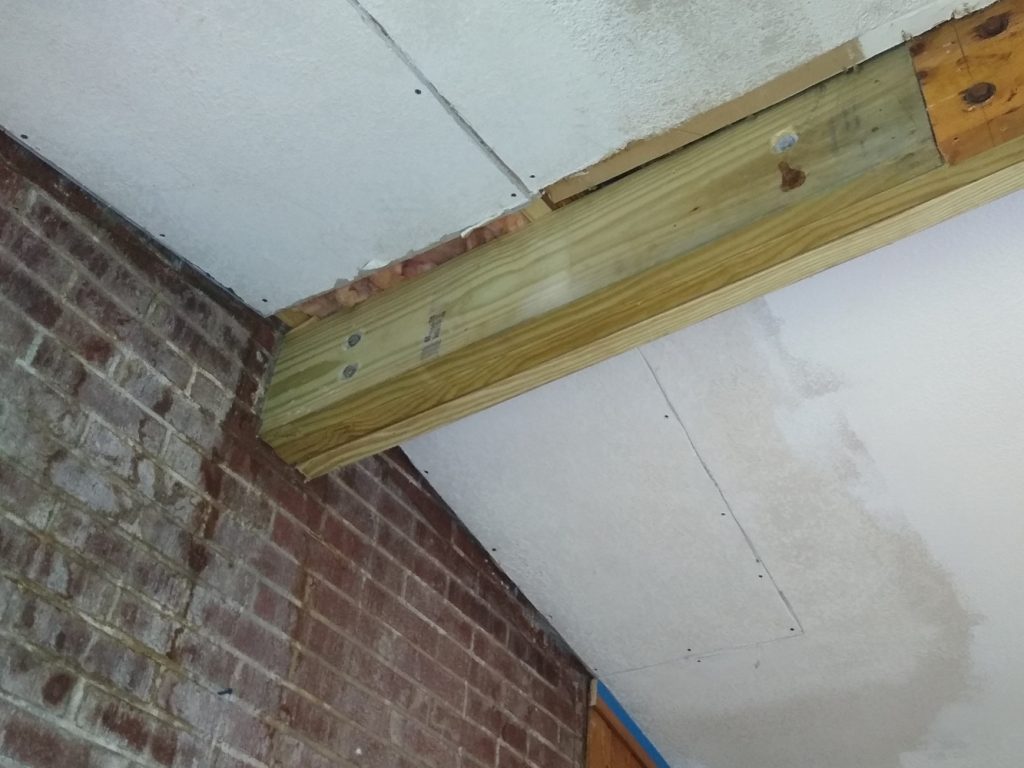
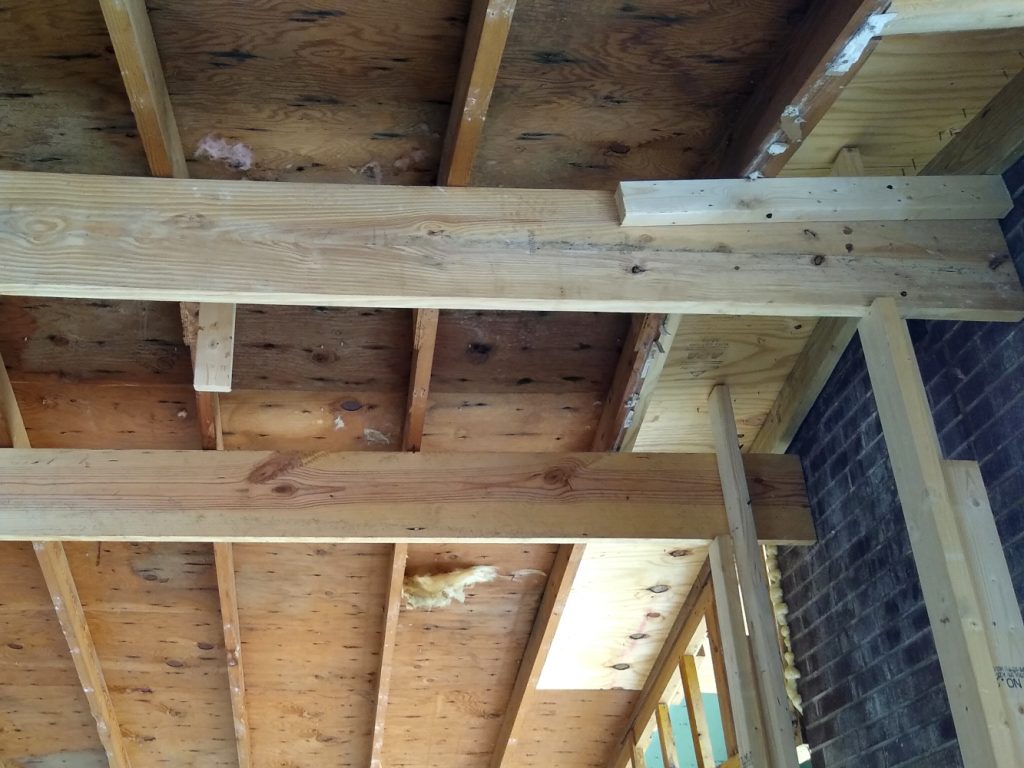
Rather than take this risk, the builder recommended that we tear down the chimney altogether, and support the roof ridge at the new front wall (which was moved out to the front face of the chimney in the original plans) instead. While this is certainly preferable to risking rejection of the project by an inspector, it also complicates the design of the roof. Rather than extending the ridge beam of the addition along the entire front of the house, the new plan is to have a simple shed roof extending out from the new front wall to cover the balcony, with a half-gable above the addition interior side wall, and a faux gable at the opposite end of the balcony tying the balcony roof into the existing house roof.
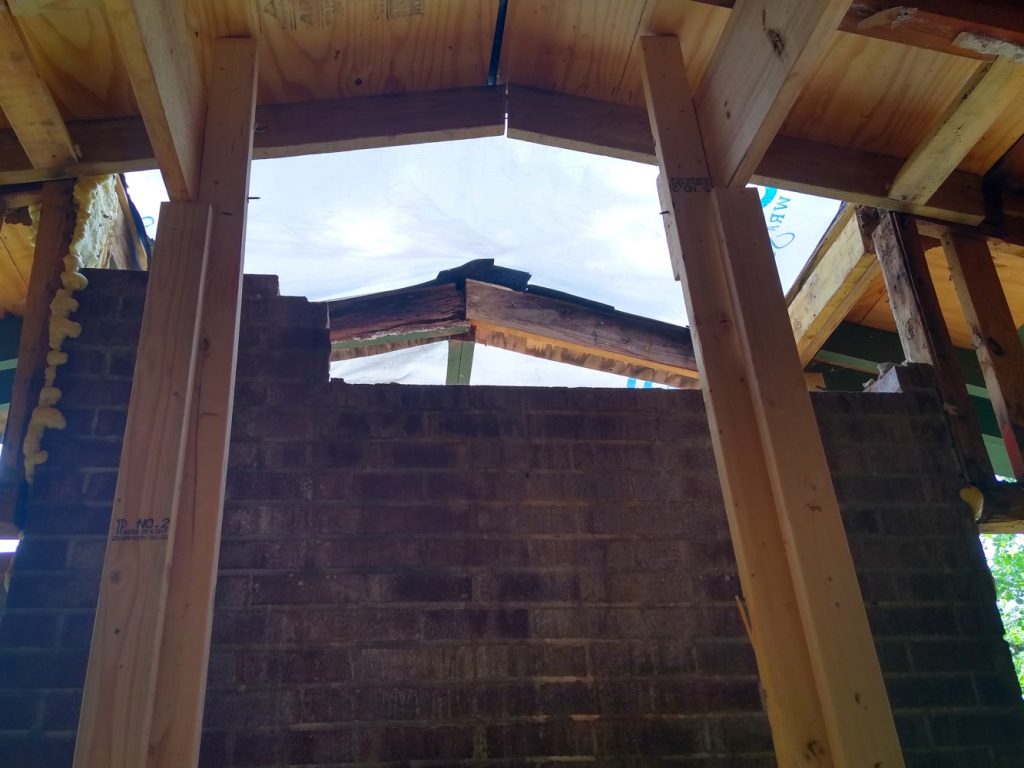
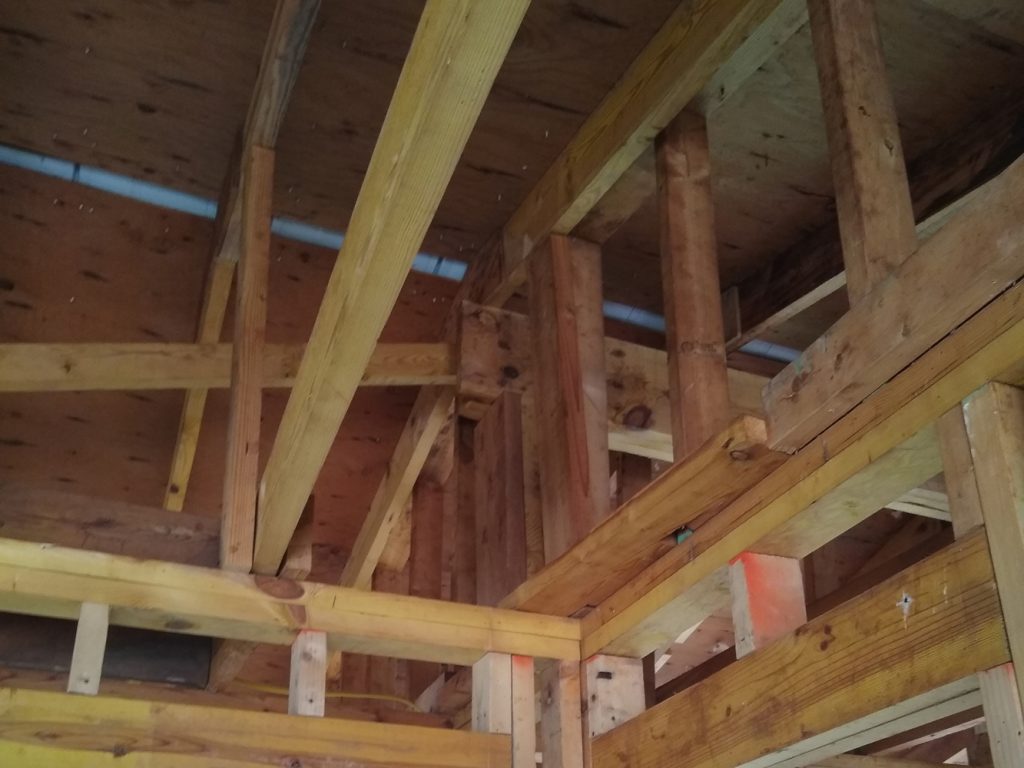
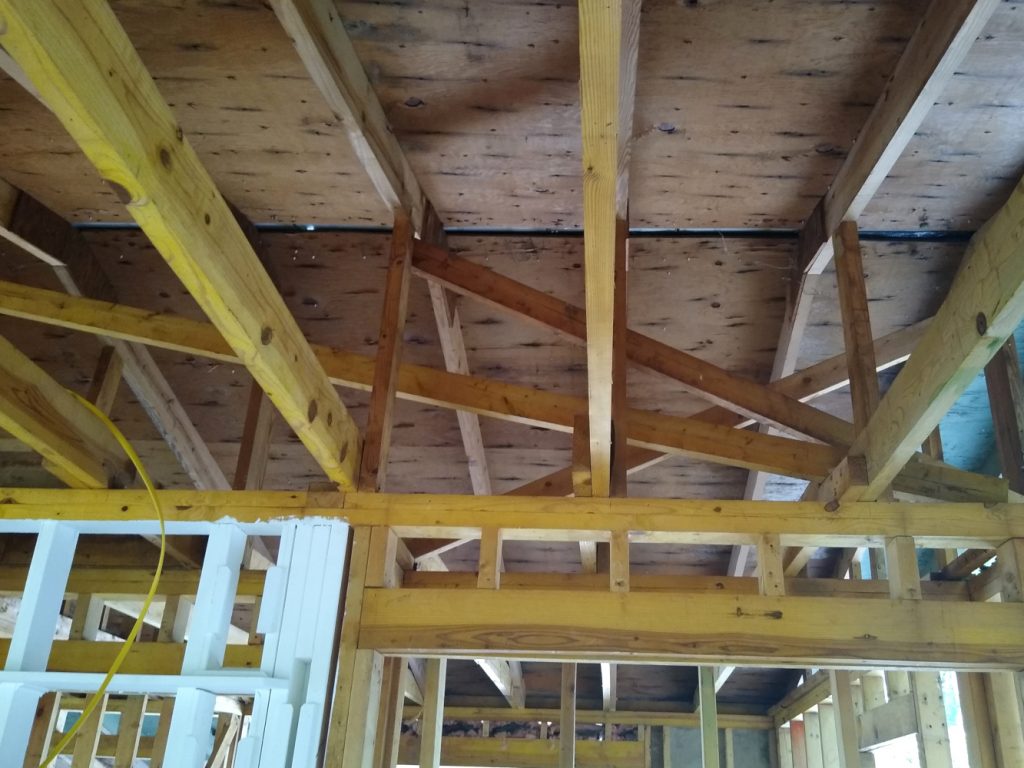
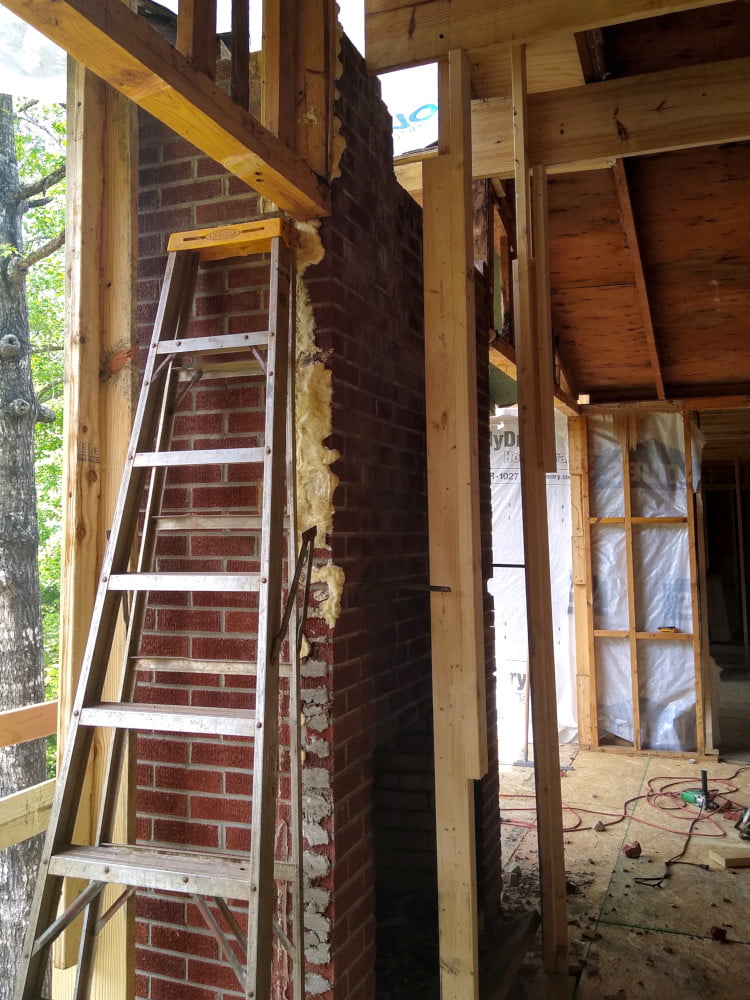
With this new plan in hand, the crew set about tearing down the old chimney. The first step was creating temporary rafter support beams alongside the existing roof ridge beam to relieve the beam of the roof load and allow it to be taken down. Once the roof beam was removed, the demolition of the chimney began.
This took much longer than expected because the chimney turned out to be largely solid all the way down to the ground. The crew expected to find a brick facade overlaying a concrete block surround for the dual ceramic flue inserts. And that was what they did find. But they also found that the concrete blocks and the spaces between the blocks and the flue inserts were filled with concrete!
Thankfully, it wasn’t solid cast concrete for the most part. Instead, the chimney had been filled from the ground all the way up to the top with concrete and masonry rubble cast of from the construction of the original house foundation. Nevertheless, demolition of the chimney took nearly three days and required a rented jackhammer to accomplish.
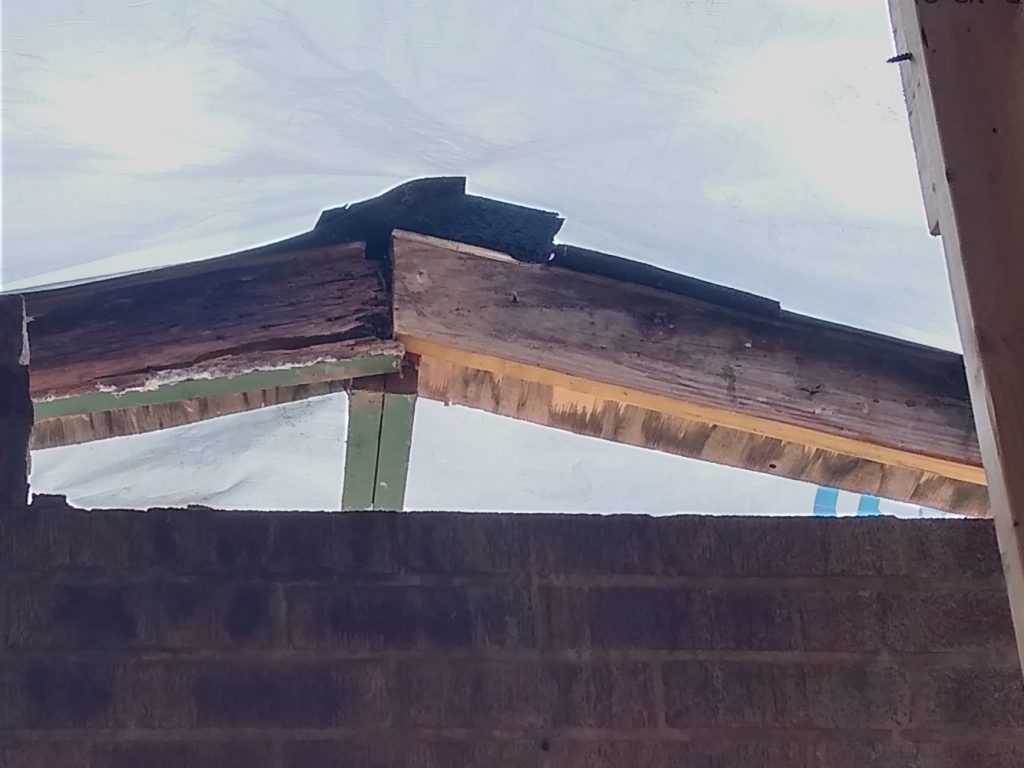
Once the chimney was partially down, the state of the rafters along the outside face of the chimney was revealed. One of these on the eastern slope of the roof had already been repaired. But the rafter on the western slope was completely rotten where it had been in contact with the chimney. The carpenter ants had hollowed this entire rafter completely out. The painted outer surface concealed the fact that the rafter was almost totally hollowed out.
If Casey’s daddy Jerry and the rest of the crew that did the initial excavation for the project had known how little they were standing on, I’ll bet they would have chosen a different course of action than lying on the roof and kicking away the weakened front balcony roof.
Unfortunately, due to a previous commitment, I was unable to get any pictures of the last stage of the chimney demolition. By the time I got up to the site that afternoon, the chimney was down, and the new front wall was already framed in.