June 8-11, 2021
While the demolition of the chimney was still underway and the floors open, the crew spent some time removing debris from the crawl space, and cutting out the plumbing and drainage that will soon be replaced. Once the chimney demolition was complete, the renovation of the old house walls and floors began in earnest.
While the chimney was still being torn down, the crew continued to work on the floor. Once all the old flooring had been torn out, laying the new sub-floor progressed quickly. They had to work around the temporary rafter supports installed before the chimney demolition. The really good news was that the removal of all the old sub-floor and various floor coverings meant that when the new sub-floor was laid it was level with the sub-floor in the new addition as originally planned.
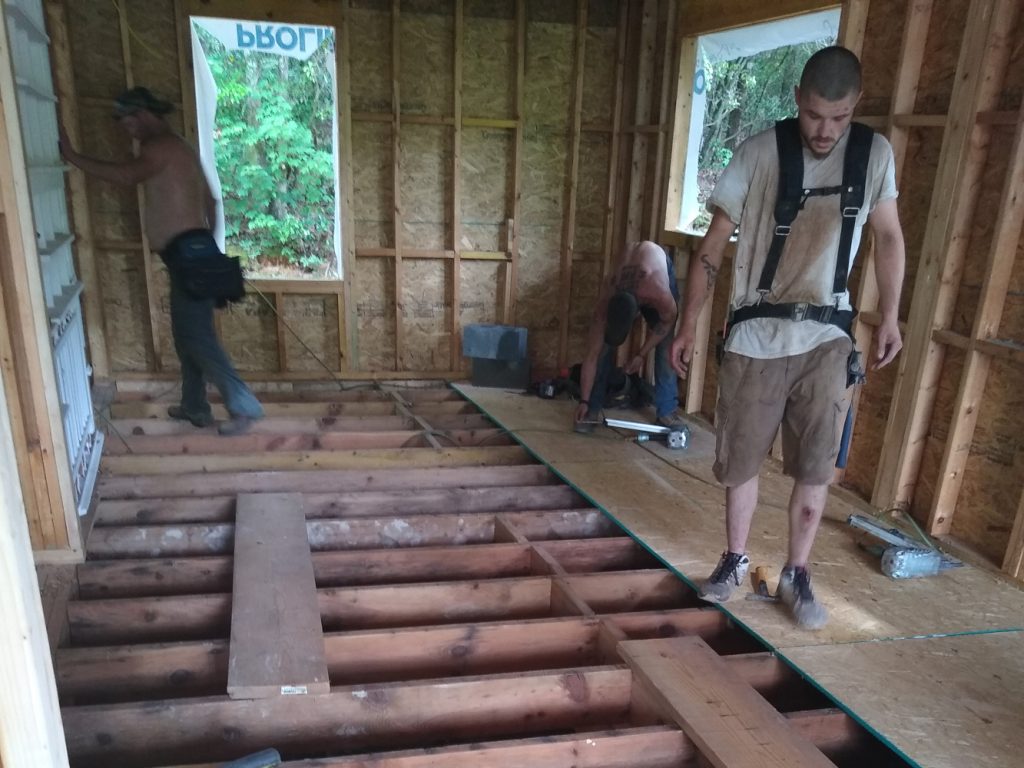


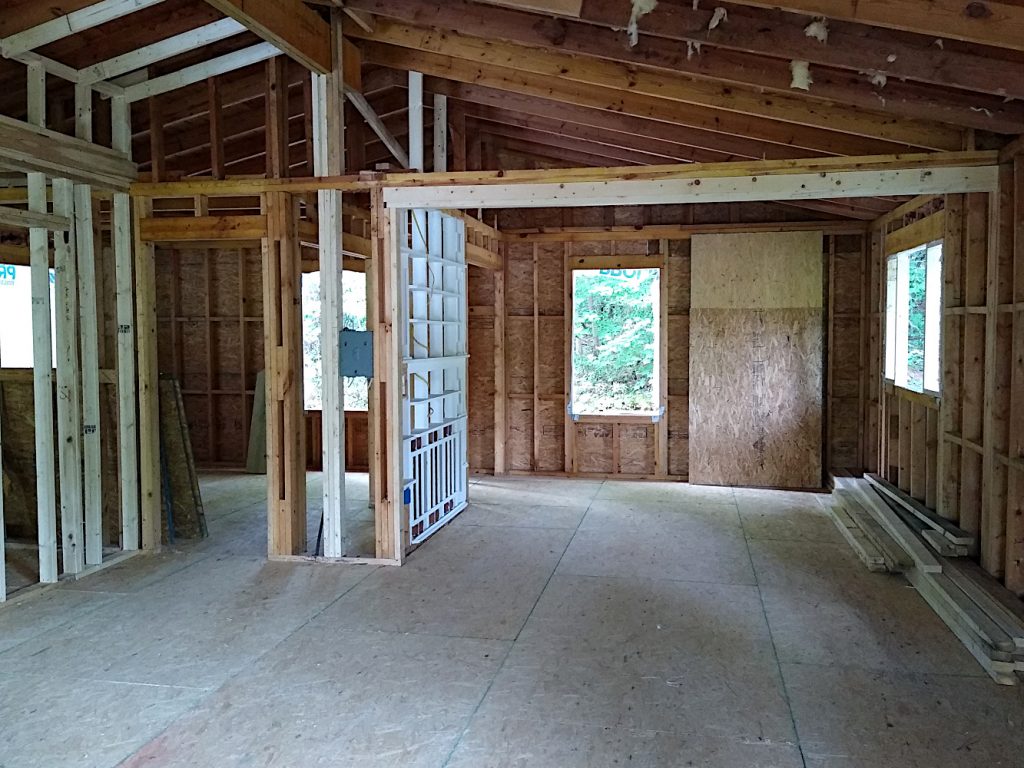
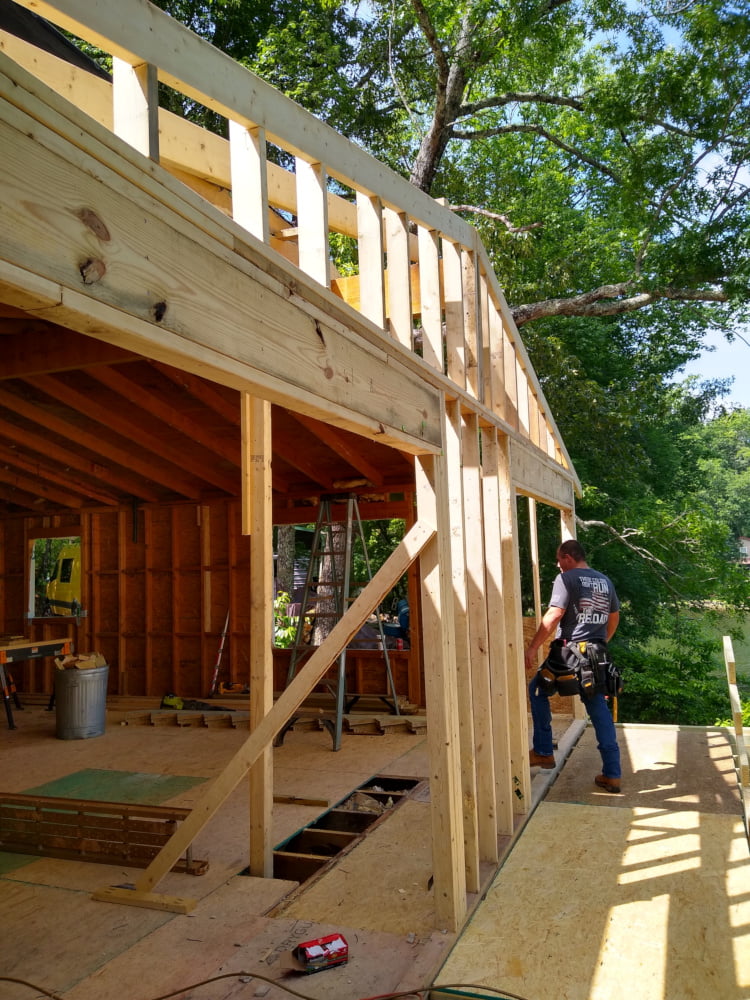
With the chimney out of the way, the planned roof and wall framing changes could proceed. First the front wall was framed in, and then the new roof ridge beam was installed with its front end supported by the new front wall, and the rear end supported as the old beam had been by the guest bedroom closet wall and the underlying joists and columns in the crawlspace. As mentioned in the previous post, these were surprisingly level once all the old floor coverings and rotted sub-floors were removed.
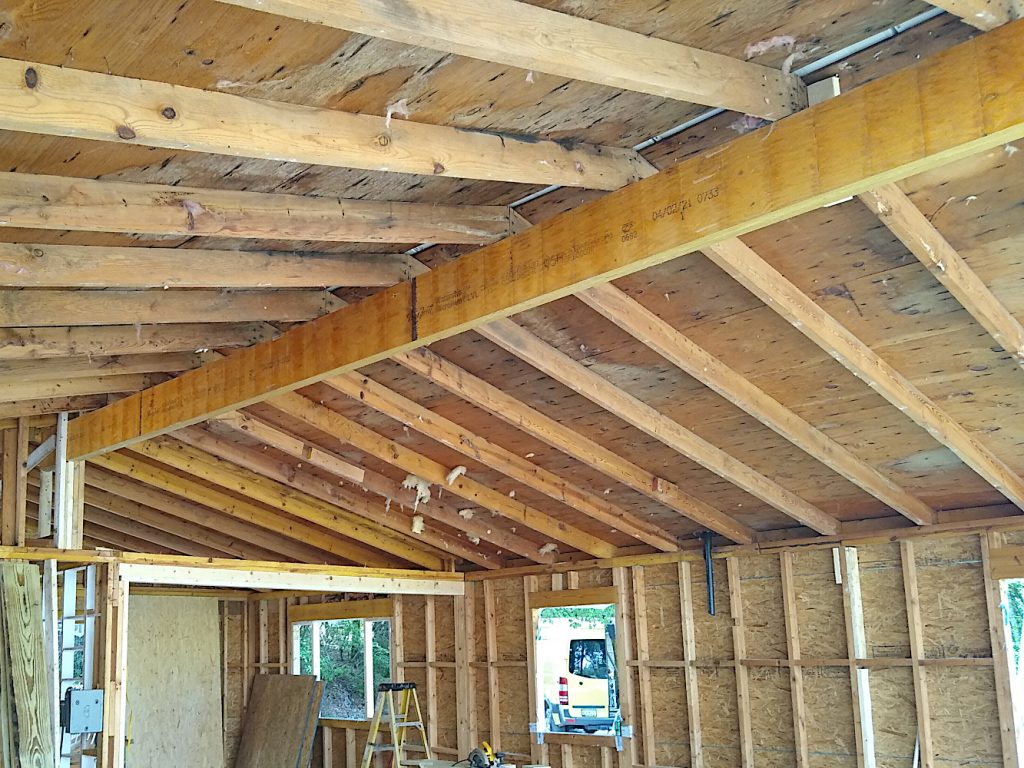
Although it isn’t apparent from these photos, the framing crew foreman ripped bevels into the top edges of the beams so that the rafters would rest firmly on them, and would be less subject to settling. The impressive thing about this is he did those cuts by hand using a circular saw without even relying on a clamped straightedge guide for the saw. Once the new ridge beam was in place, the temporary roof supports were removed.
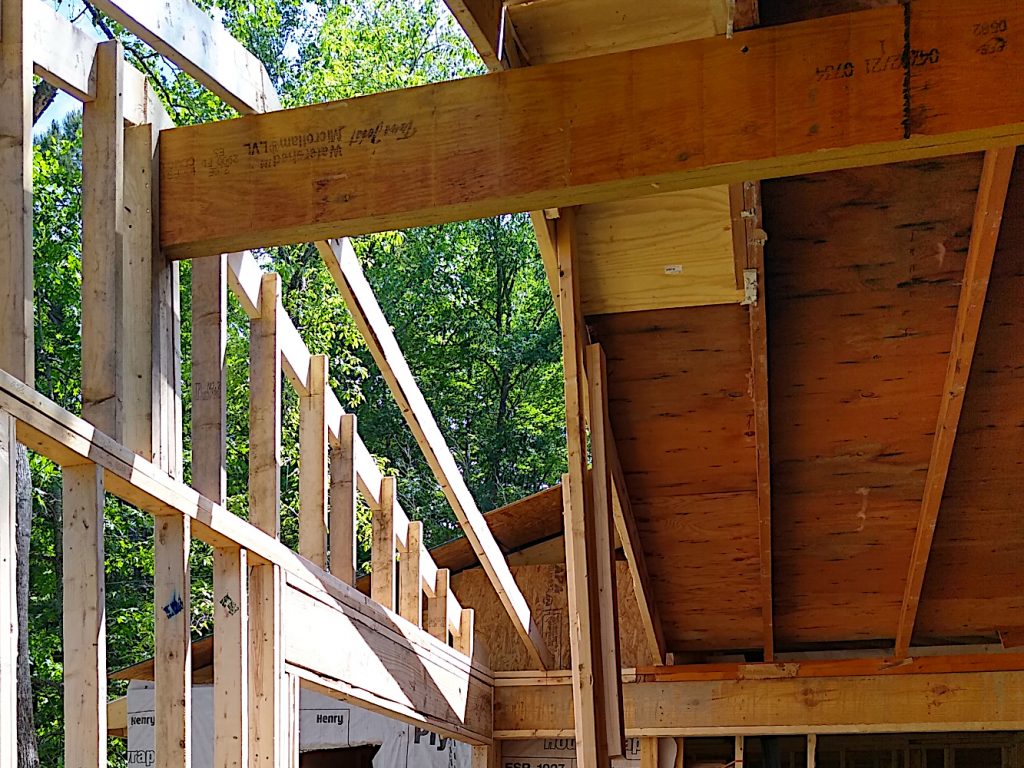
The original (repaired) ridge beam was constructed from three layers of 2×10 overlapped in a staggered fashion and bolted together. None of the constituent boards ran the entire length of the span. When we moved into the house, we didn’t know it, but the front few feet of this beam were rotten from the continual seepage of the chimney bricks, and had been totally eaten away by carpenter ants. When we began to do the painting of the ceiling, we realized how extensive this damage was, and had the beam repaired.
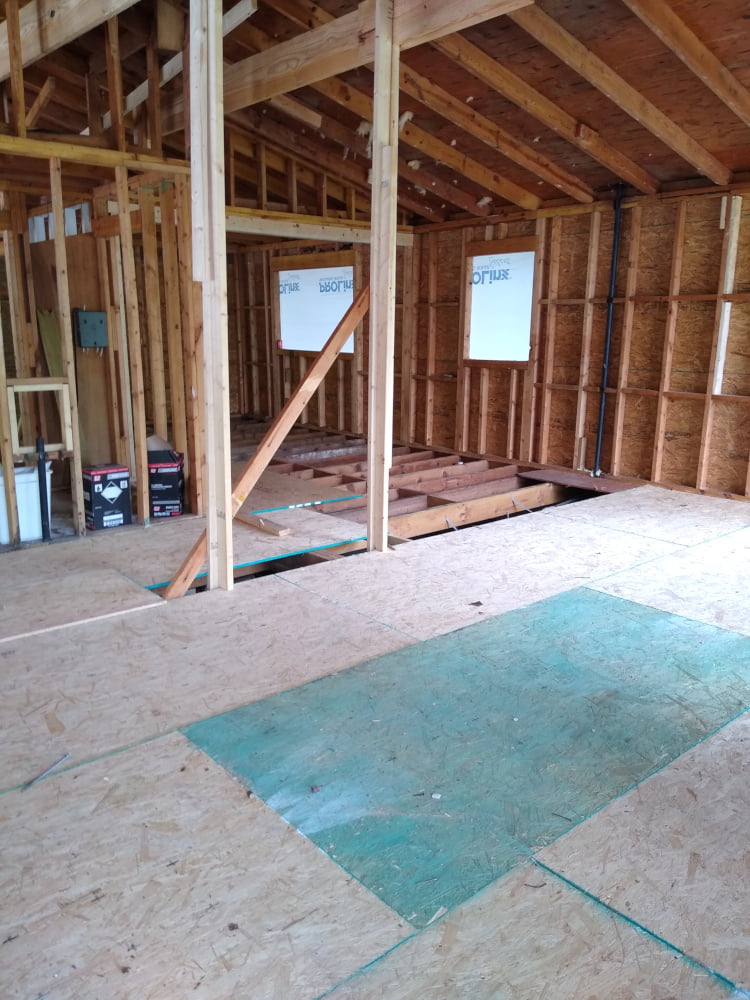
The new ridge support is constructed from two 2×12 LVL beams which span the entire distance from the front wall to the guest bedroom closet. The load is transferred to the foundation at both ends by concrete block piers.

With the new front wall in place, the window and door layouts in the front of the main house became easier to envision. Once the windows arrive, they can be put right into place.


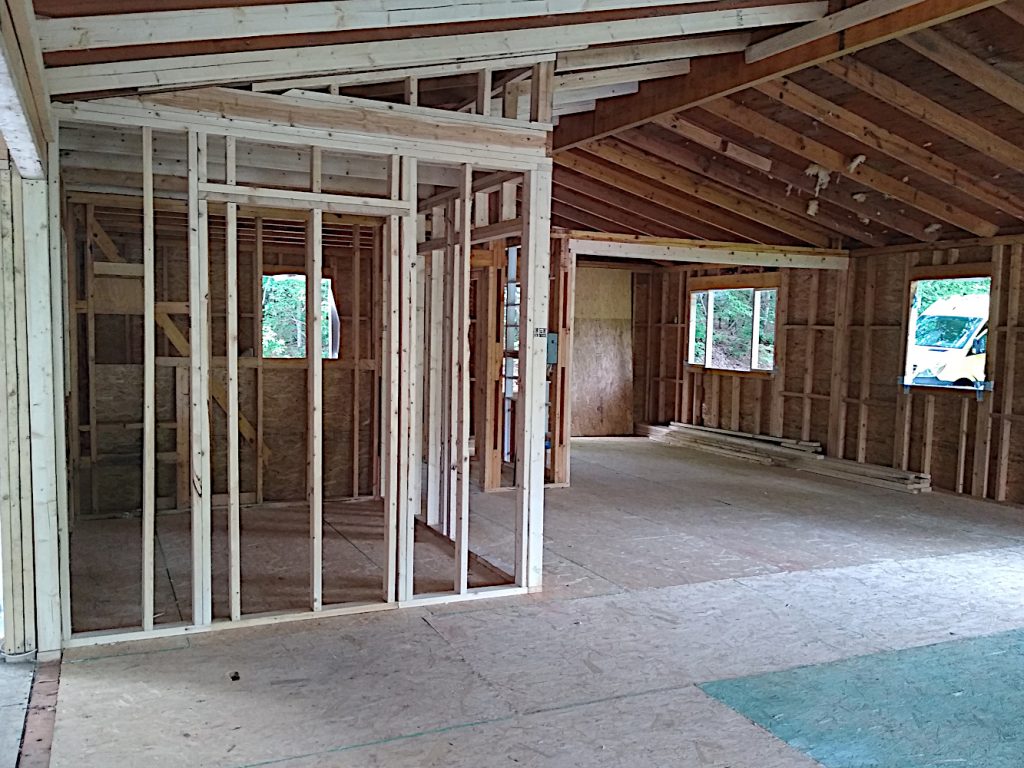
In the middle of all this work, it became evident that the plan would need to be modified slightly. The window placement in the bathrooms wasn’t compatible with the tubs and showers we have on order. So the planned layout of the guest bathroom needed to be re-thought.
While contemplating that, I realized that the narrower door in this bathroom was redundant. So we moved the larger door around to the side of the room, leaving the guest bath with a single, ADA compliant door. Of course that left us with an extra narrow door. Perhaps the House of Doors will accept returns.
The windows in both bathrooms also needed to be moved because they weren’t quite high enough to clear the tops of the shower surrounds. The window in the master bath was moved over the center of the tub. In the guest bath, we had to rearrange the layout of the fixtures. The window will now be over the toilet in the corner of the room closest to the house entry door. This also has the advantage of locating the toilet closer to a direct line from the master toilet to the septic tank.
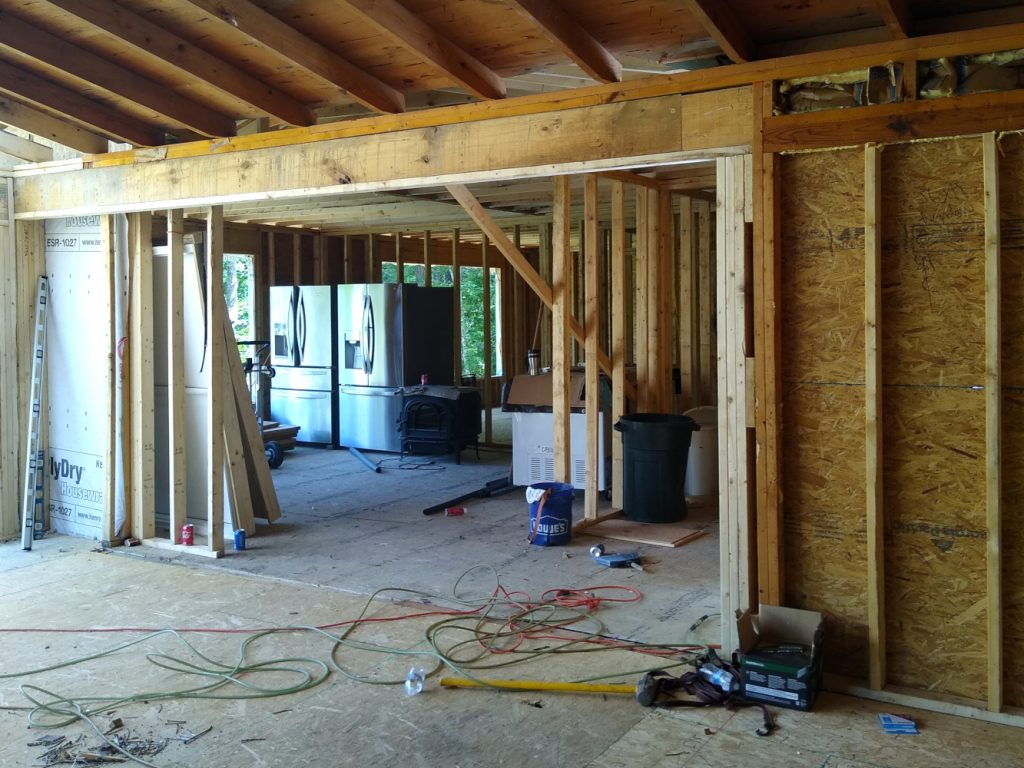
We also decided to remove the flat ceiling over the pantry, and run the vault ceiling all the way to the back of the house on the kitchen and pantry side. Unfortunately, that meant that the beautiful support beam installed by our friend Juan Armintariz was no longer needed, and will eventually be removed. This may also impact the kitchen cabinet design slightly since the wall cabinets will no longer need to “duck around” this beam.
The support beam for the old rafters along the mating wall was also completed, and the wall removed. With that wall taken away, the opening up of the whole space from the entry door past the studio through the living room and dining area all the way around through the kitchen and pantry with its new vaulted ceiling became apparent. About two thirds of the old house’s floor area will now be open space with vaulted ceilings, making the house look much larger than it really is. Even better, with the chimney removed and the front wall pushed out to where the front of the chimney was, the space is almost three feet (about 10%) deeper all along the front of the house.


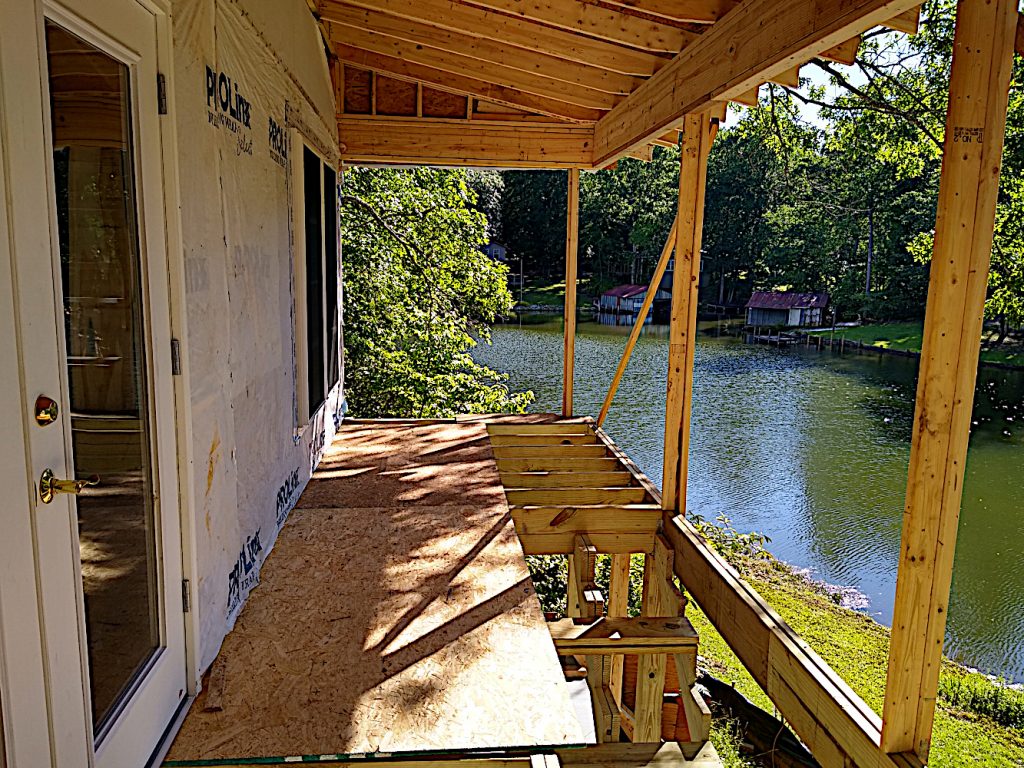
Once the chimney was removed, the balcony roof could be framed and sheathed. All that remained was to weave this shed roof in with the existing house roof on the western end and the addition roof on the eastern end. That mating ended up looking a little strange, but that’s a story for another day. Ordinary sub-floor sheeting was laid without fastening onto the balcony floor frame just to allow the crew to move around out there. The delivery of the waterproof floor and water shedding system for the balcony has been delayed indefinitely.
The stairs leading down from the balcony to the patio below were also partially framed pending arrival of the permanent balcony floor.
At this point, the project was at another halt pending delivery of the windows and bathroom fixtures – both scheduled for next week.