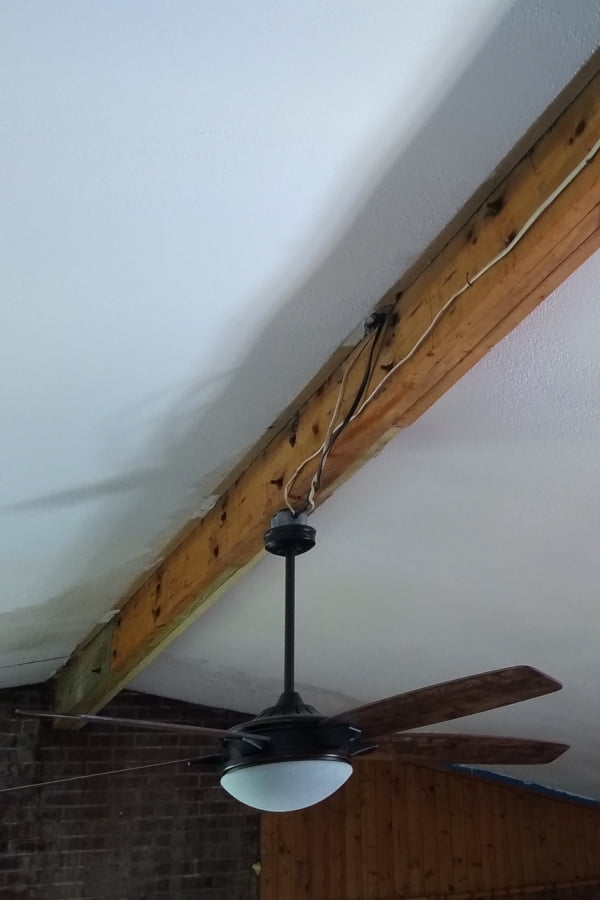
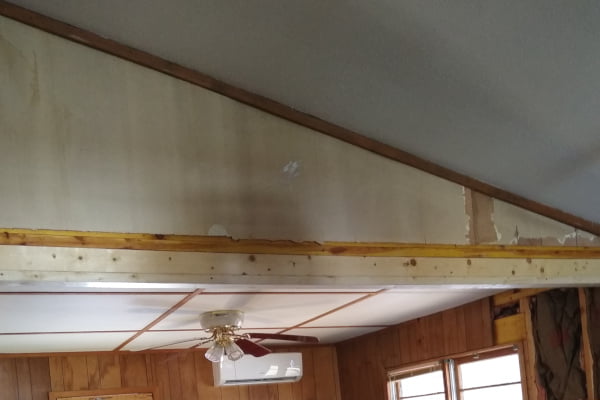
Before we even decided to contract for the addition, we had decided to expand the kitchen by removing the wall between the kitchen and the second bedroom. We were concerned that this might be a supporting wall for the vault ceiling in the living room/kitchen space. The front (lakeside) space of the existing house serves as the living room, dining area, and kitchen. The space occupies roughly two thirds of the building, with a large masonry fireplace on the front wall. The roof ridge in this area is supported by a beam constructed from tripled 2 x 10s.
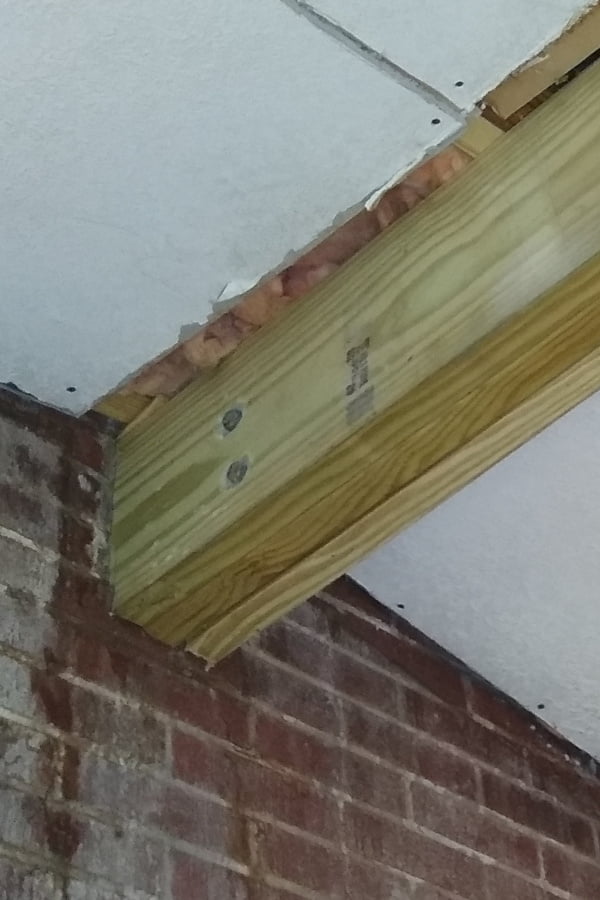
The beam is notched into the chimney on the front end, and continues into the interior wall at the back end. We were concerned that the back end of this beam was being supported by the wall we hoped to remove between the kitchen and bedroom. As it turned out though, the beam ends just after it enters the dividing wall, and is supported by stud-work in that corner, which carries the roof load down to a concrete and cinder block pier in the crawlspace below. The back end of the roof is constructed with rafters and joists with flat ceilings. The joists and ridge at the back end of the house are supported by the dividing wall between the bedrooms.
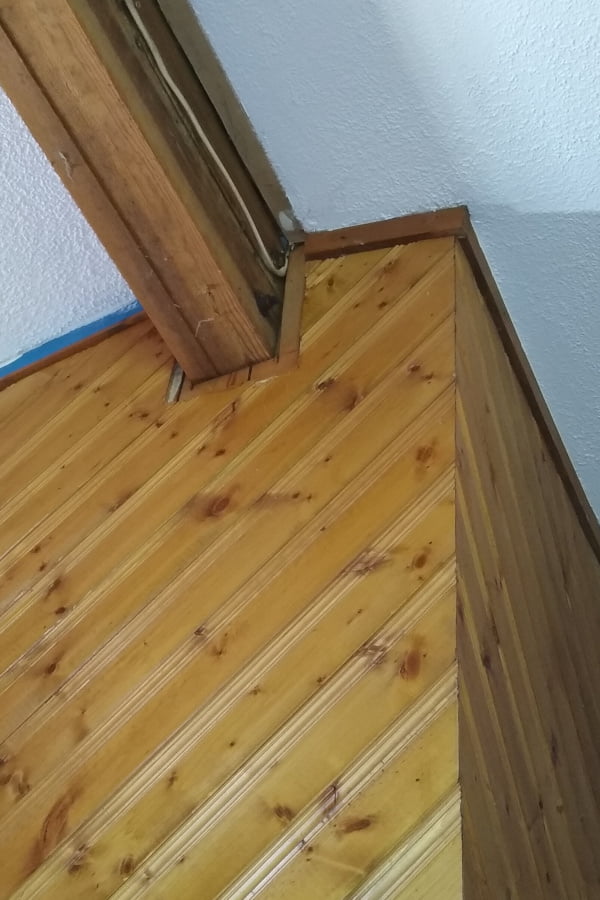
NOTE – As can be seen from the photo of the chimney end of the beam, the masonry of the chimney seeps water. We took action to seal the roof flashing when we replaced the roof right after we moved in, but it still seeps a little. That’s one of the things we’re hoping to correct during the addition project. When we first arrived, this seepage was quite significant. Given this ready source of water, the carpenter ants had set up housekeeping in that area, and had completely chewed out the first couple of feet of the beam along with most of the roof framing around the chimney. The water had also rotted out a good deal of the roof sheathing. Originally, the beam was encased inside a beautiful sheath made from the tongue-and-groove pine you see in these photos. The chimney seepage was covered by a huge photograph of the previous owner’s 1960 GMC pickup truck. So the damage to the beam and roof framing was hidden. If the home inspector had known what little he was standing on at the chimney end of the roof, he wouldn’t have stood there.
Living Room Roof Beam

We asked a friend from church who runs a small carpentry business to help us determine whether it would be safe to take out the wall. He said it would be safe, so we hired him to do the work.
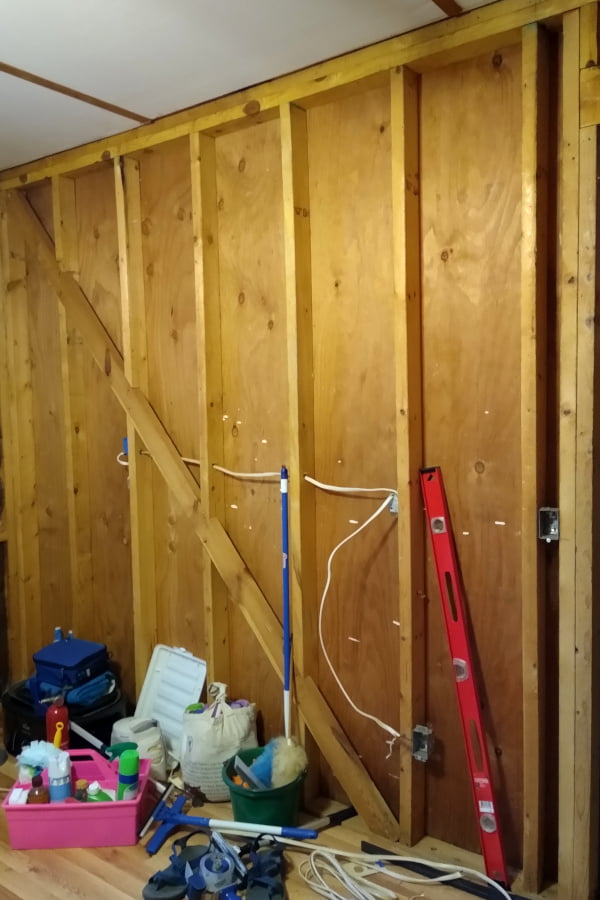
Before he could start, we needed to remove the kitchen cabinets from along that wall. Since the L-shaped granite counter top was all one piece, we needed to make temporary props for the part of the counter top that was no longer being supported by cabinets.
We also needed to move the light switch and power outlets from the wall. While I moved the switch, Sue took out the outlets. One of the “quirks” of the house was an empty outlet box placed in that wall at countertop level. Unfortunately, it was above the countertop, but not high enough to clear the backsplash. The previous owners had disconnected this outlet and left the empty box in the wall when they installed new kitchen cabinets and countertops. No doubt they intended to eventually panel over the unused outlet, but never got around to it.
As part of their kitchen renovation, they also installed a GFCI outlet in that wall as required by code for any new work in a kitchen, bath, laundry, or other damp area. Unfortunately, in order for a GFCI to effectively I the power feed in the event of a GF, it needs to be wired with a G – something very difficult to do with the two-wire cable that is currently running throughout most of the house. But hey. The kitchen had a GFCI installed, so it was good to go, right?
Never mind that the light over the sink was installed using a piece of Romex that was just resting on top of the wall cabinet, and hooked up to the previous kitchen light feed by twisting the wires together and wrapping it up with a wad of electrician’s tape. Power junction box? What’s that? But I digress…
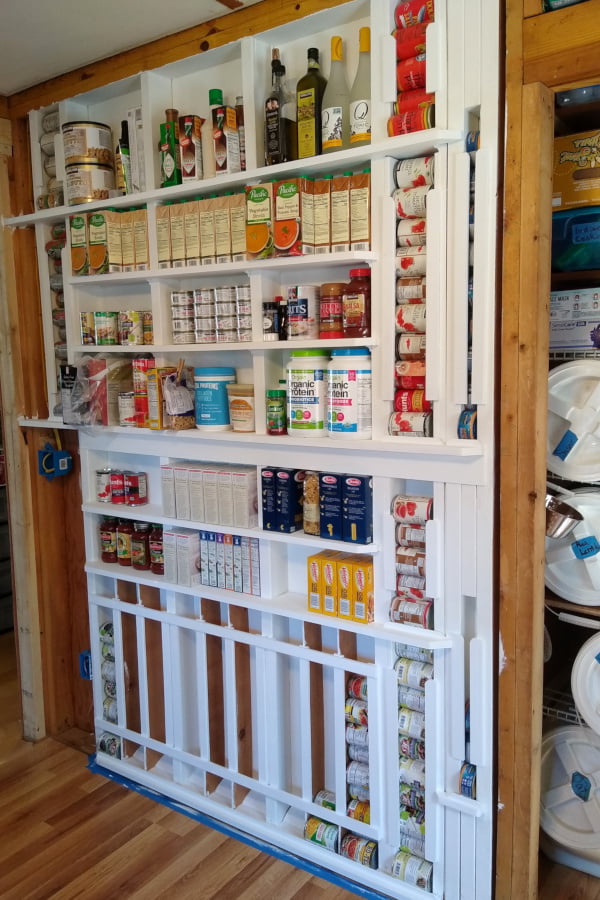
Sue found an idea on the internet to install shelving and slots for canned goods into the spaces between studs of interior walls. Once the divider wall was removed, we adapted that idea to build storage for canned and dry goods into the pantry (former bedroom) interior side wall. The canned goods storage slots allow the newest items to be added at the top while the oldest ones may be pulled out from the bottom for use. The open slot allows quickly counting the quantity on-hand. Note that the bottom portion is completely taken up with canned goods slots, and the dry goods storage is at the top as a discouragement to little doggies who might want to partake of the victuals.